Garden DIY: Creating New Garden Paths
Making new garden paths can be complicated, to say the least. But I have found a method that works really well for me. My garden paths are cheap, easy to make and close to completely weed-free!

I'm creating new garden paths and beds at the same time in Oak Hill Cottage Garden. The picture was taken in May, 2019.
My new place Oak Hill Cottage Garden is such a great place to experiment and try new things. Watching the garden grow is such a creative and fun process! Most of what I do here was inspired by my work in the kitchen garden at home. I'm so happy about everything I have learned from my gardening these past few years. I can use this knowledge in new and creative ways here at Oak Hill, which helps me prioritize and keep track of my many projects at the same time.
Creating new garden paths is one of those main tasks that you probably want to get started on as soon as possible. I'm going to talk more about how I create the paths in my garden and why I choose this particular method below!
What type of path?
First of all, I just wanted to address a few things that people seem to believe about creating new garden paths. For example, some people think that you can actually create paths that you don't need to do any maintenance on. I'm sorry to disappoint you, but this simply isn't true! If you decide to create a new garden, then you might want to decide already from the start how much time you want to spend working on your paths. Then, you just need to find the right type for you. Creating new garden paths can feel like a daunting task. That's why you want to be sure which type of path you want to go for and do the research too.
If you want to see what the garden looked like before I started to create the beds and paths, you can take a look at the post below and also check out the vlog I created earlier. This material really shows what a huge difference paths makes to the overall appearance of your garden.
Read more: How to edge your beds
About my new garden paths
I want my paths to be very low-maintenance. That's almost a must in my gardens. I have tried several different types over the years, but one particular method really stayed with me. My paths in the kitchen garden at home were made this way and I decided to go for them here too. I think that these paths are really easy to make, cheap and also quite nice-looking.
My first thought for Oak Hill Cottage Garden was to utilize as much space as possible for the growing. That's why I wanted my garden paths to be very narrow. But then I changed my mind, as you can see here in the pictures. The paths are actually very wide now instead. I decided that I wanted people to be able to visit my garden in the future, and that's why I went for wider paths instead. The visitors need to get around after all! I might do things differently in other parts of the garden, but this seemed like a good decision at least for now.
If you want to get more space for your plants though, then you might want to start viewing your area as a bed first and foremost, with little pathways simply crossing it. This tip comes from the gardening legend Monty Don. I really like this way of thinking about it!
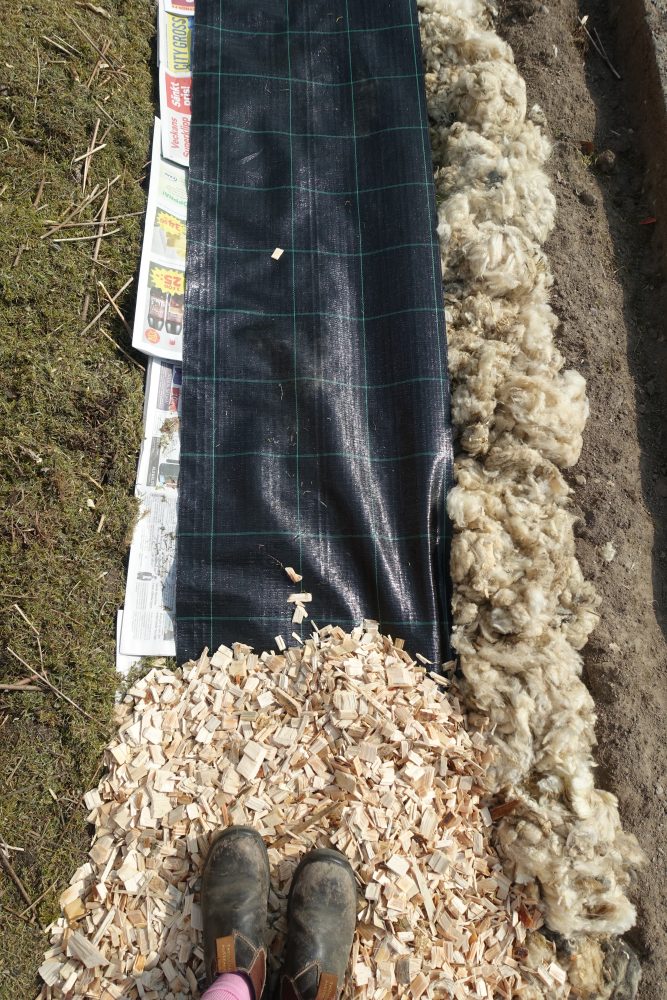
This is what a new path looks like! I use newspapers (non-toxic ink) underneath the landscaping fabric closest to the left bed and then add woodchips on top.
I use:
- newspapers
- black, plastic landscaping fabric
- woodchips
New garden paths – Instructions:
- put the landscaping fabric right on the ground, without removing the lawn or similar before. It doesn't matter if the soil is uneven and lumpy
- if you have lots of weeds in your lawn, then you might want to add a layer of newspapers or cardboard underneath the landscaping fabric
- add a nice layer of woodchips or bark on top of the lanscaping fabric and spread it out
You can edge your garden paths in a few different ways. Doing it next to a bed is probably the easiest way. You just put a newspaper underneath the landscaping fabric and the woodchips. Then, you leave an inch or so up against the bed or underneath the pallet collar if you want to use that. This way, you create a little barrier that keeps weeds from growing in the bed from the beginning.
The woodchips are very light in the beginning, but get darker over time.

The woodchips just look so lovely, and I also added some old stone slabs I found underneath the lawn that I put my pots on.
Why landscaping fabric?
The landscaping fabric is simply used to create a little block between the path and the ground. If you were to put the woodchips straight on the soil, then the plants are going to grow through the layer of woodchips sooner or later. Unless you have a really thick layer that actually manages to smother the weeds underneath, that is. It might be easier to take care of the weeds in a smaller space with a few narrow paths, but this also means that you have to:
- keep a batch of woodchips around that you can use to fill the paths once a year or so
- have time to do weeding in the paths regularly
If you have an even slightly larger garden at home, then I think you will be overwhelmed by the pure workload of trying to keep the paths weed-free. Not from the very start perhaps, but it will add up later in summer.
I often see people writing about how landscaping fabric is completely unnecessary, but don't believe them. I have witnessed so many gardens where the weeds become a huge issue. We even tried a few different variations of fabric-less paths with really poor results. So, I finally came to the conclusion that we needed to use the landscaping fabric. And I haven't regretted it once.
More: My woodchip garden paths
Why woodchips?
I have used so many different types of materials in my paths these past few years. Woodchips are by far my favorite. In the past, I also tried bark (either store-bought bark in bags or bark from the saw mill), straw and coarse sawdust. The downside with all of the materials I tried using in the past is that they start to decompose so quickly. I basically get new soil on top of my landscaping fabric in just a few years. And then, the weeds start to grow of course. The woodchips take longer to break down though.
Some people put wool on top of the landscaping fabric in their new garden paths. I wouldn't recommend this though. The wool more or less becomes a thick wet blanket, that turns a bit slimy over time. I would prefer using it straight on top of the soil or perhaps on top of newspapers in the more narrow paths between the beds. Main pathways in your garden can look a bit unkempt if you keep a lot of wool there all summer long for example. That's my experience at least!
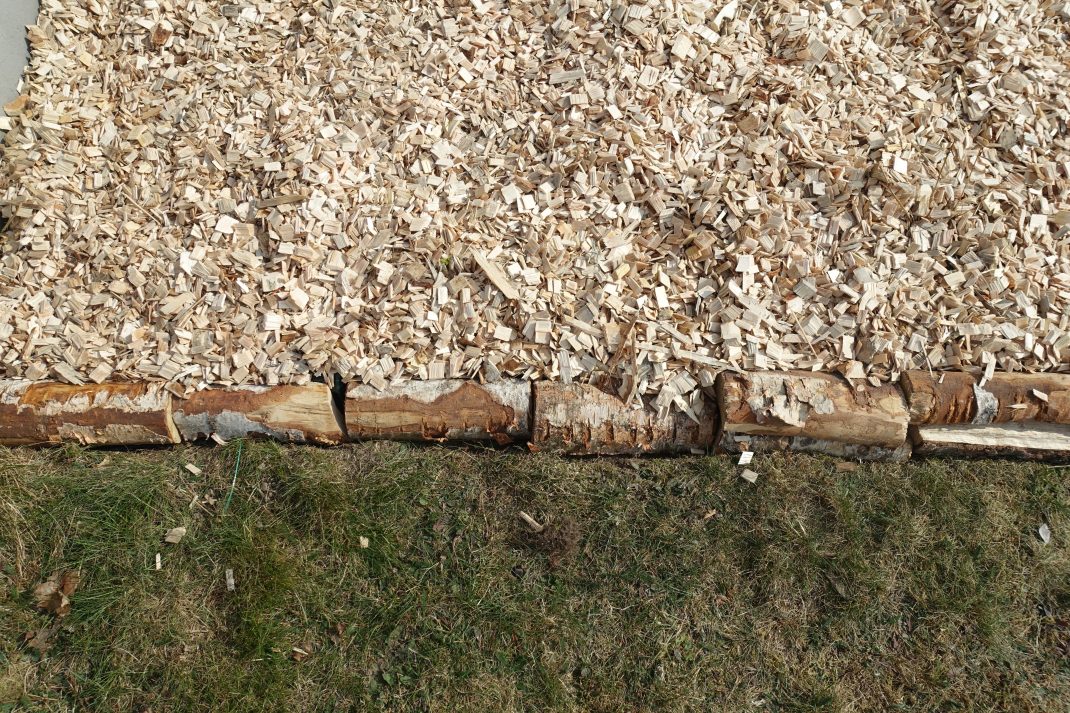
I made a provisional little edge between the woodchips and the lawn/grass path.
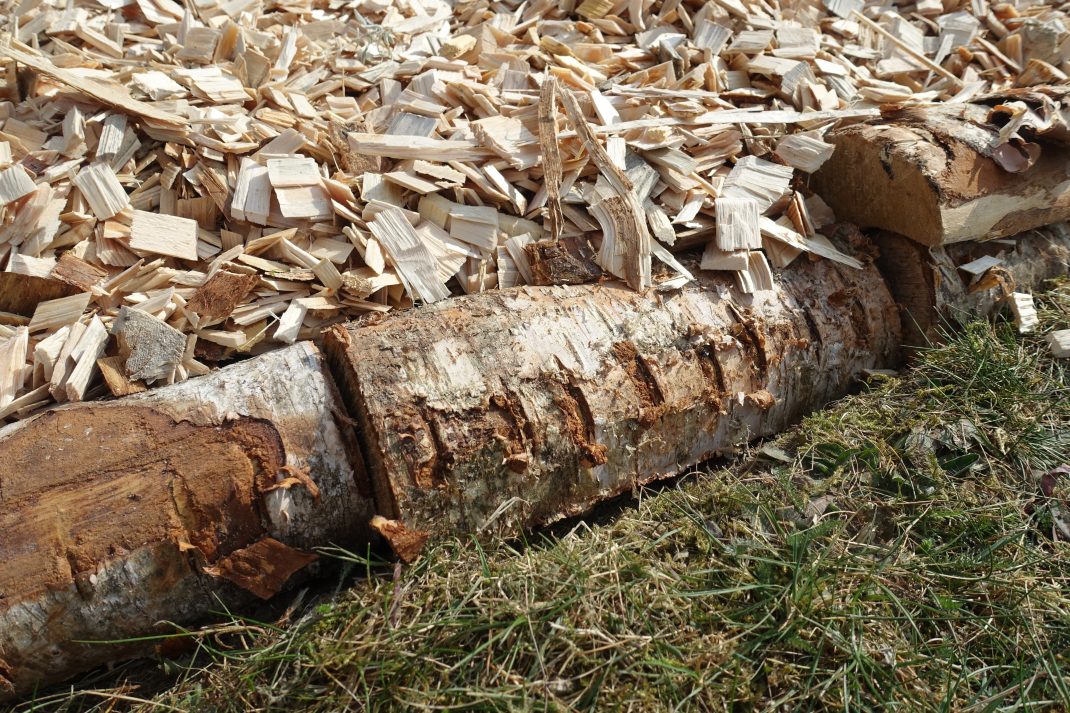
I buried some landscaping fabric in a little ditch here. The logs on top help keep it in place.
More: How to edge your beds
Maintenance-free?
Even though these paths are really easy to work with, I have to say that they aren't completely maintenance-free. The woodchips are starting to decompose now after around five years, so I need to add new ones. I sometimes put the old woodchips on top of my beds. Then, I just put a fresh layer on my path.
I know that some plants might self-seed right in the woodchips where it's warm and damp during summer. These weeds are really easy to remove though. Couch grass and other weeds growing from underneath might be a bit more problematic though. But you really can't compare it to the amount of weeding you need to do if you don't use landscaping fabric.
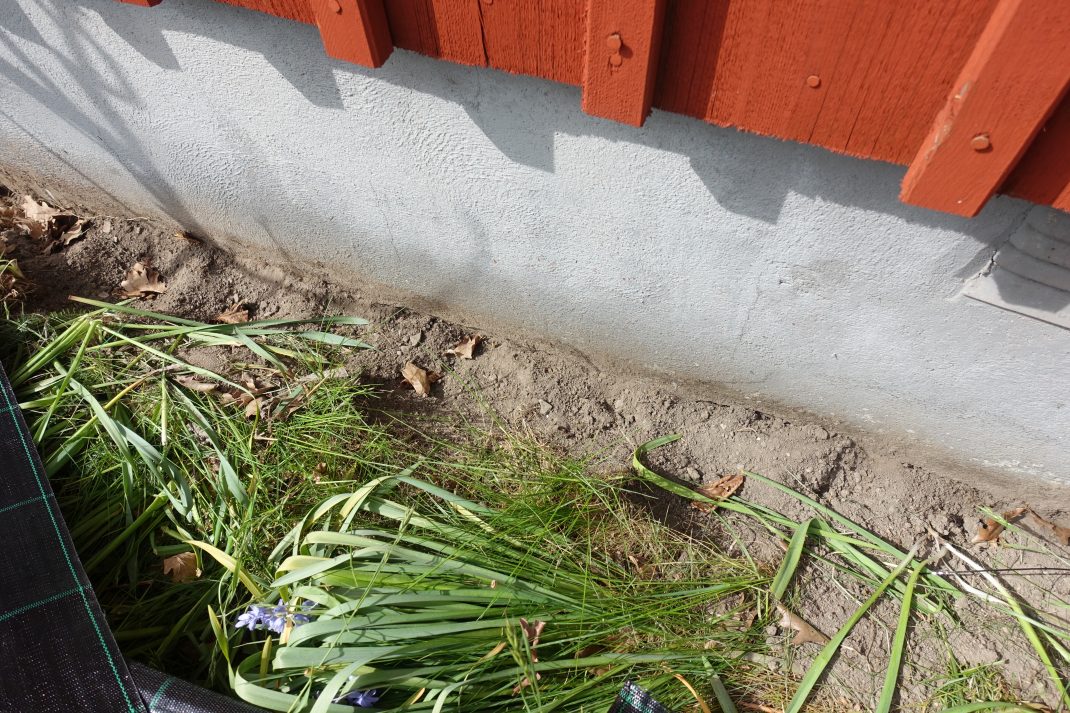
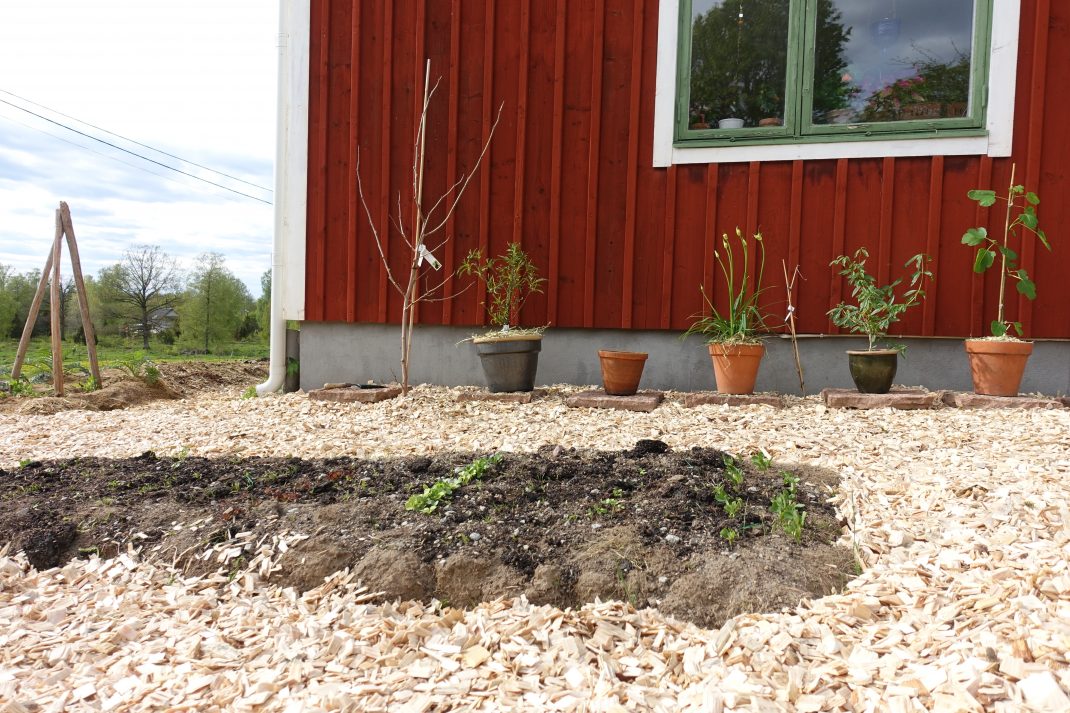
Right next to the house. Soil and plenty of alliums, grass and windflowers.

The south side looks a lot prettier now with the new garden paths. You can really focus on the lovely plants rather than grass and weeds that can be so distracting.
More: Using woodchips in the garden
I hope this post inspired you to create new garden paths at home! I just wanted to finish by saying one thing I didn't mention before: Woodchips are amazingly light. You can move your woodchips all over the garden quite easily, even my kids can do it without any issues. If you want to know more about using woodchips in the garden, follow the links in this article or use the search function. Good luck!
/Sara Bäckmo
07. June 2023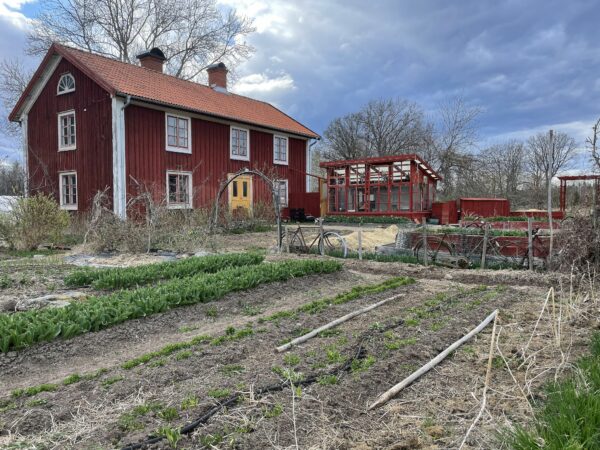
What stops the wood chips from blowing away in breeze or high winds
Hi! I water the wood chip and it stops it from blowing away. After a few weeks the wood chips stay on the ground without blowing away.