Growing delicious celeriac
Would you like to start growing celeriac in your own garden too? These are my best tips on growing celeriac at home!
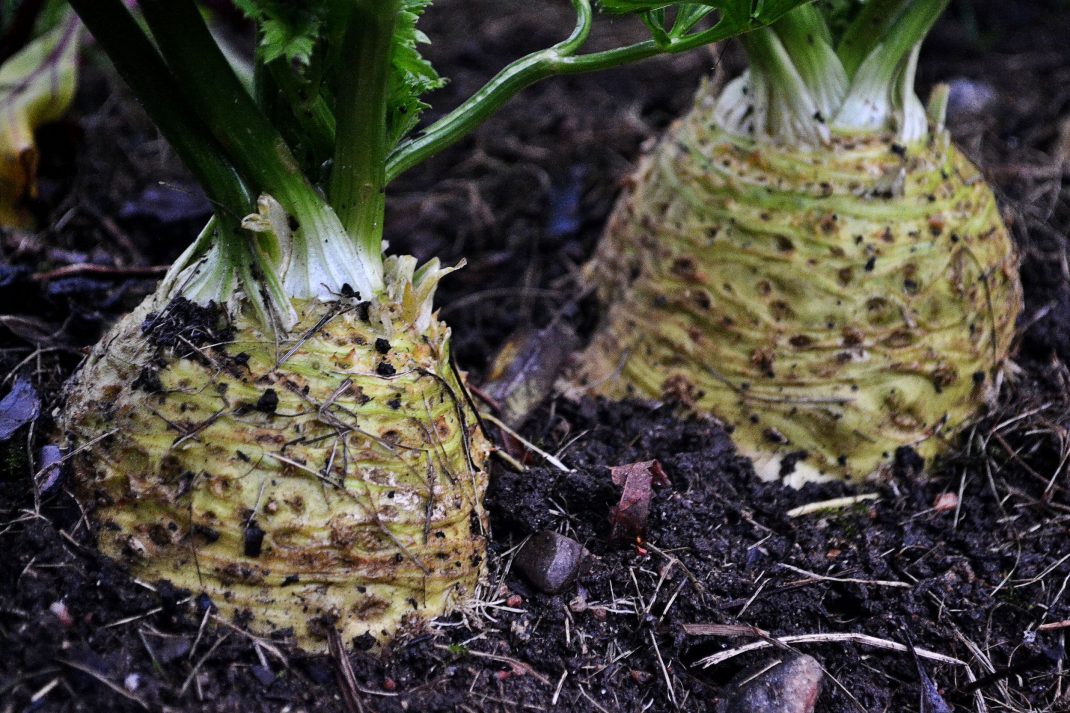
My large, beautiful celeriac, that I harvested last fall. I'm really happy with how it turned out.
Celeriac is in many ways just the perfect vegetable. You can use the root in so many different types of dishes. And the crispy stalks are a lot like celery, so you can use them interchangeably. Celeriac is very easy to work with too. It's the perfect choice for companion planting projects, and it's easy to store. I actually managed to store it for more than 6 months in a bucket with peat (somewhere cool, but where it won't freeze.) What more could you possibly want?
Sow celeriac early
Celeriac needs some time to grow large. It doesn't have to be large to taste great though, the early little roots are very good too! I sow celeriac already in January, by broadcast sowing the seeds in a trough. According to the instructions on the seed packet, you can do it in February-March too. Be careful with the new plants. They are very fragile in the beginning and break very easily. Later, I plant them in little pots where I leave them until it's time to put them outside. They start growing nicely a few weeks after planting them outside. By then, they really take off and grow quite quickly. The plant smells lovely, just like celery!
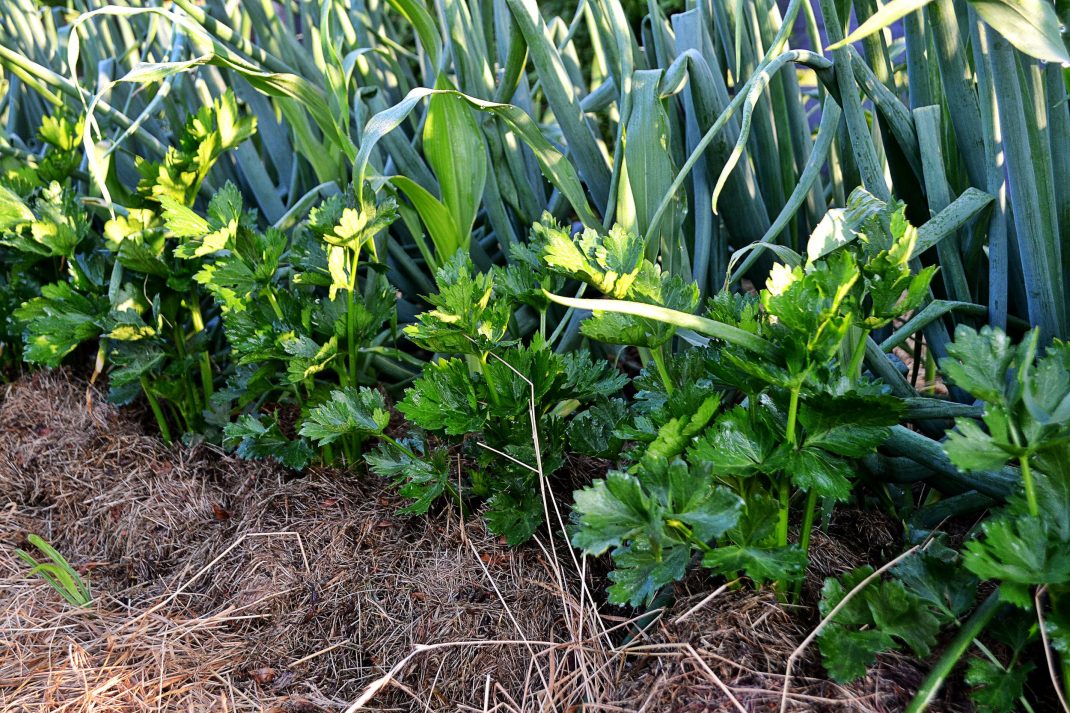
I'm growing my celeriac in a mulched deep bed.
The celeriac can take low temperatures and I try to get them out as soon as possible so they can adapt to the cold. I put them in the beds in April-May. I decided to put them in my long deep bed in the kitchen garden. After planting them, you actually don't need to do very much for a while.
Remember to provide nutrients though. I try to "feed" my plant with mulch several times during the season. I sometimes give it a splash of nettle water too. This will give your plants the best possible conditions to grow and thrive.
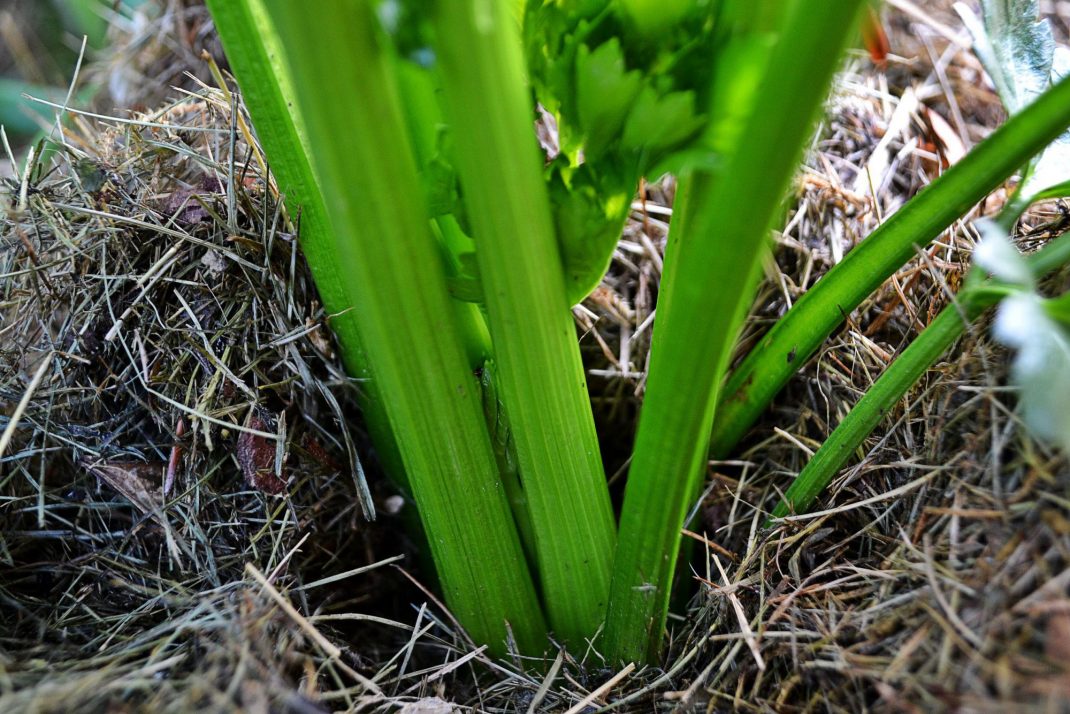
The celeriac produces plenty of large stalks.
The celeriac has usually grown large enough so that I can start removing stalks in July. I always "groom" my celeriac quite mercilessly and remove almost all of the stalks except for 3-5 large ones on top of the root. Why I do this? Well, it will make the plant concentrate all the growth to the root so that you can harvest nice and big celeriac later!
Similar stalks
You can use the celeriac stalks just like celery. I use my stalks in stews, sauces, vegetable salts and more. If you don't want to use the stalks right away, you could always chop them and put them in the freezer for later. I don't use the leaves at all though. I think they taste like grass!
The celeriac grows very quickly in late summer and fall. So make sure to give it some extra fertilizer at this time. Add some extra grass clippings, nettle water or diluted urine. This will give the celeriac an extra boost! The top picture shows the celeriac I grew in 2014, the variety Prinz.
Easy to store
We do harvest throughout the season, but I try to go for the stalks first and leave the roots until later. I pick the first little roots already in August but harvest most of the plants before the frost comes. I clean and rinse them and then I put them into large buckets filled with peat. Putting a newspaper over the bucket will help keep some moisture in there. I leave the buckets in our hallway where it gets quite cold during winter, but rarely below freezing.
Growing celeriac takes a bit of work but it always pays off! I have never had any issues with pests or diseases these past few years. My roots have always been healthy and very tasty!
/Sara Bäckmo
Leave a Reply