Propagating blackberries with tip layering
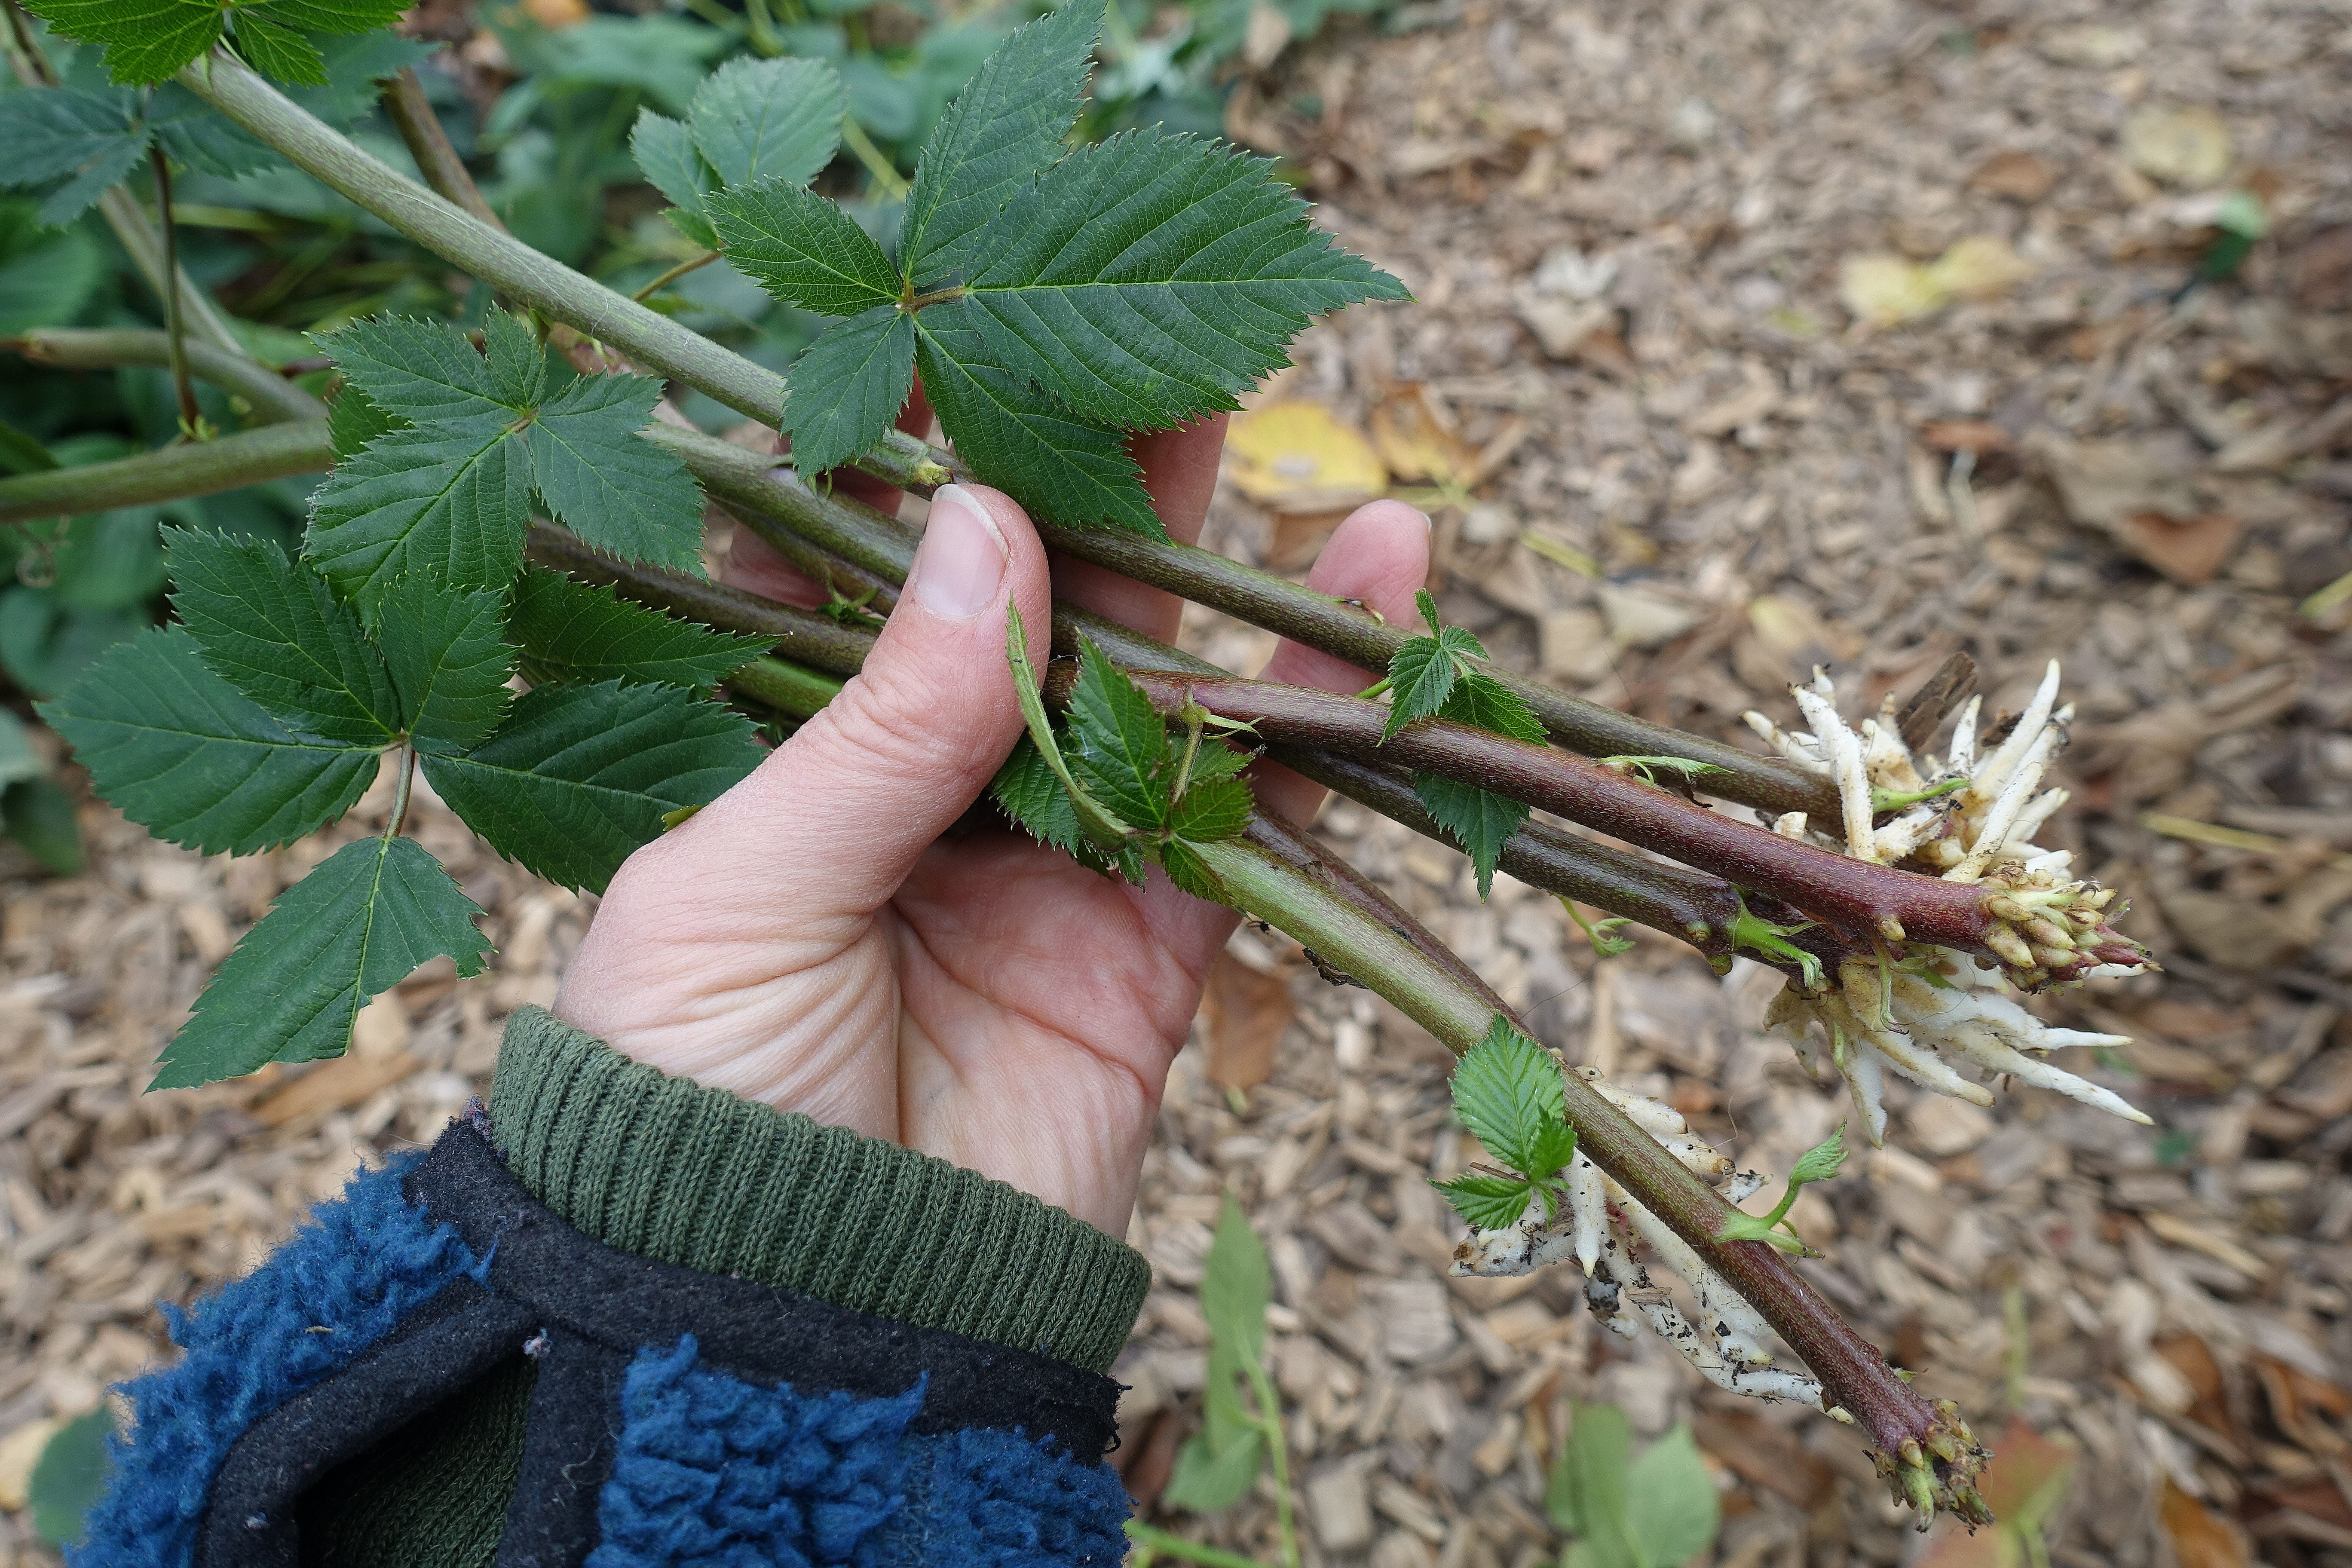
I recently found five branches with new roots on my thornless blackberry bush in the polytunnel. I decided to plant them and now I'm just waiting for them to grow!
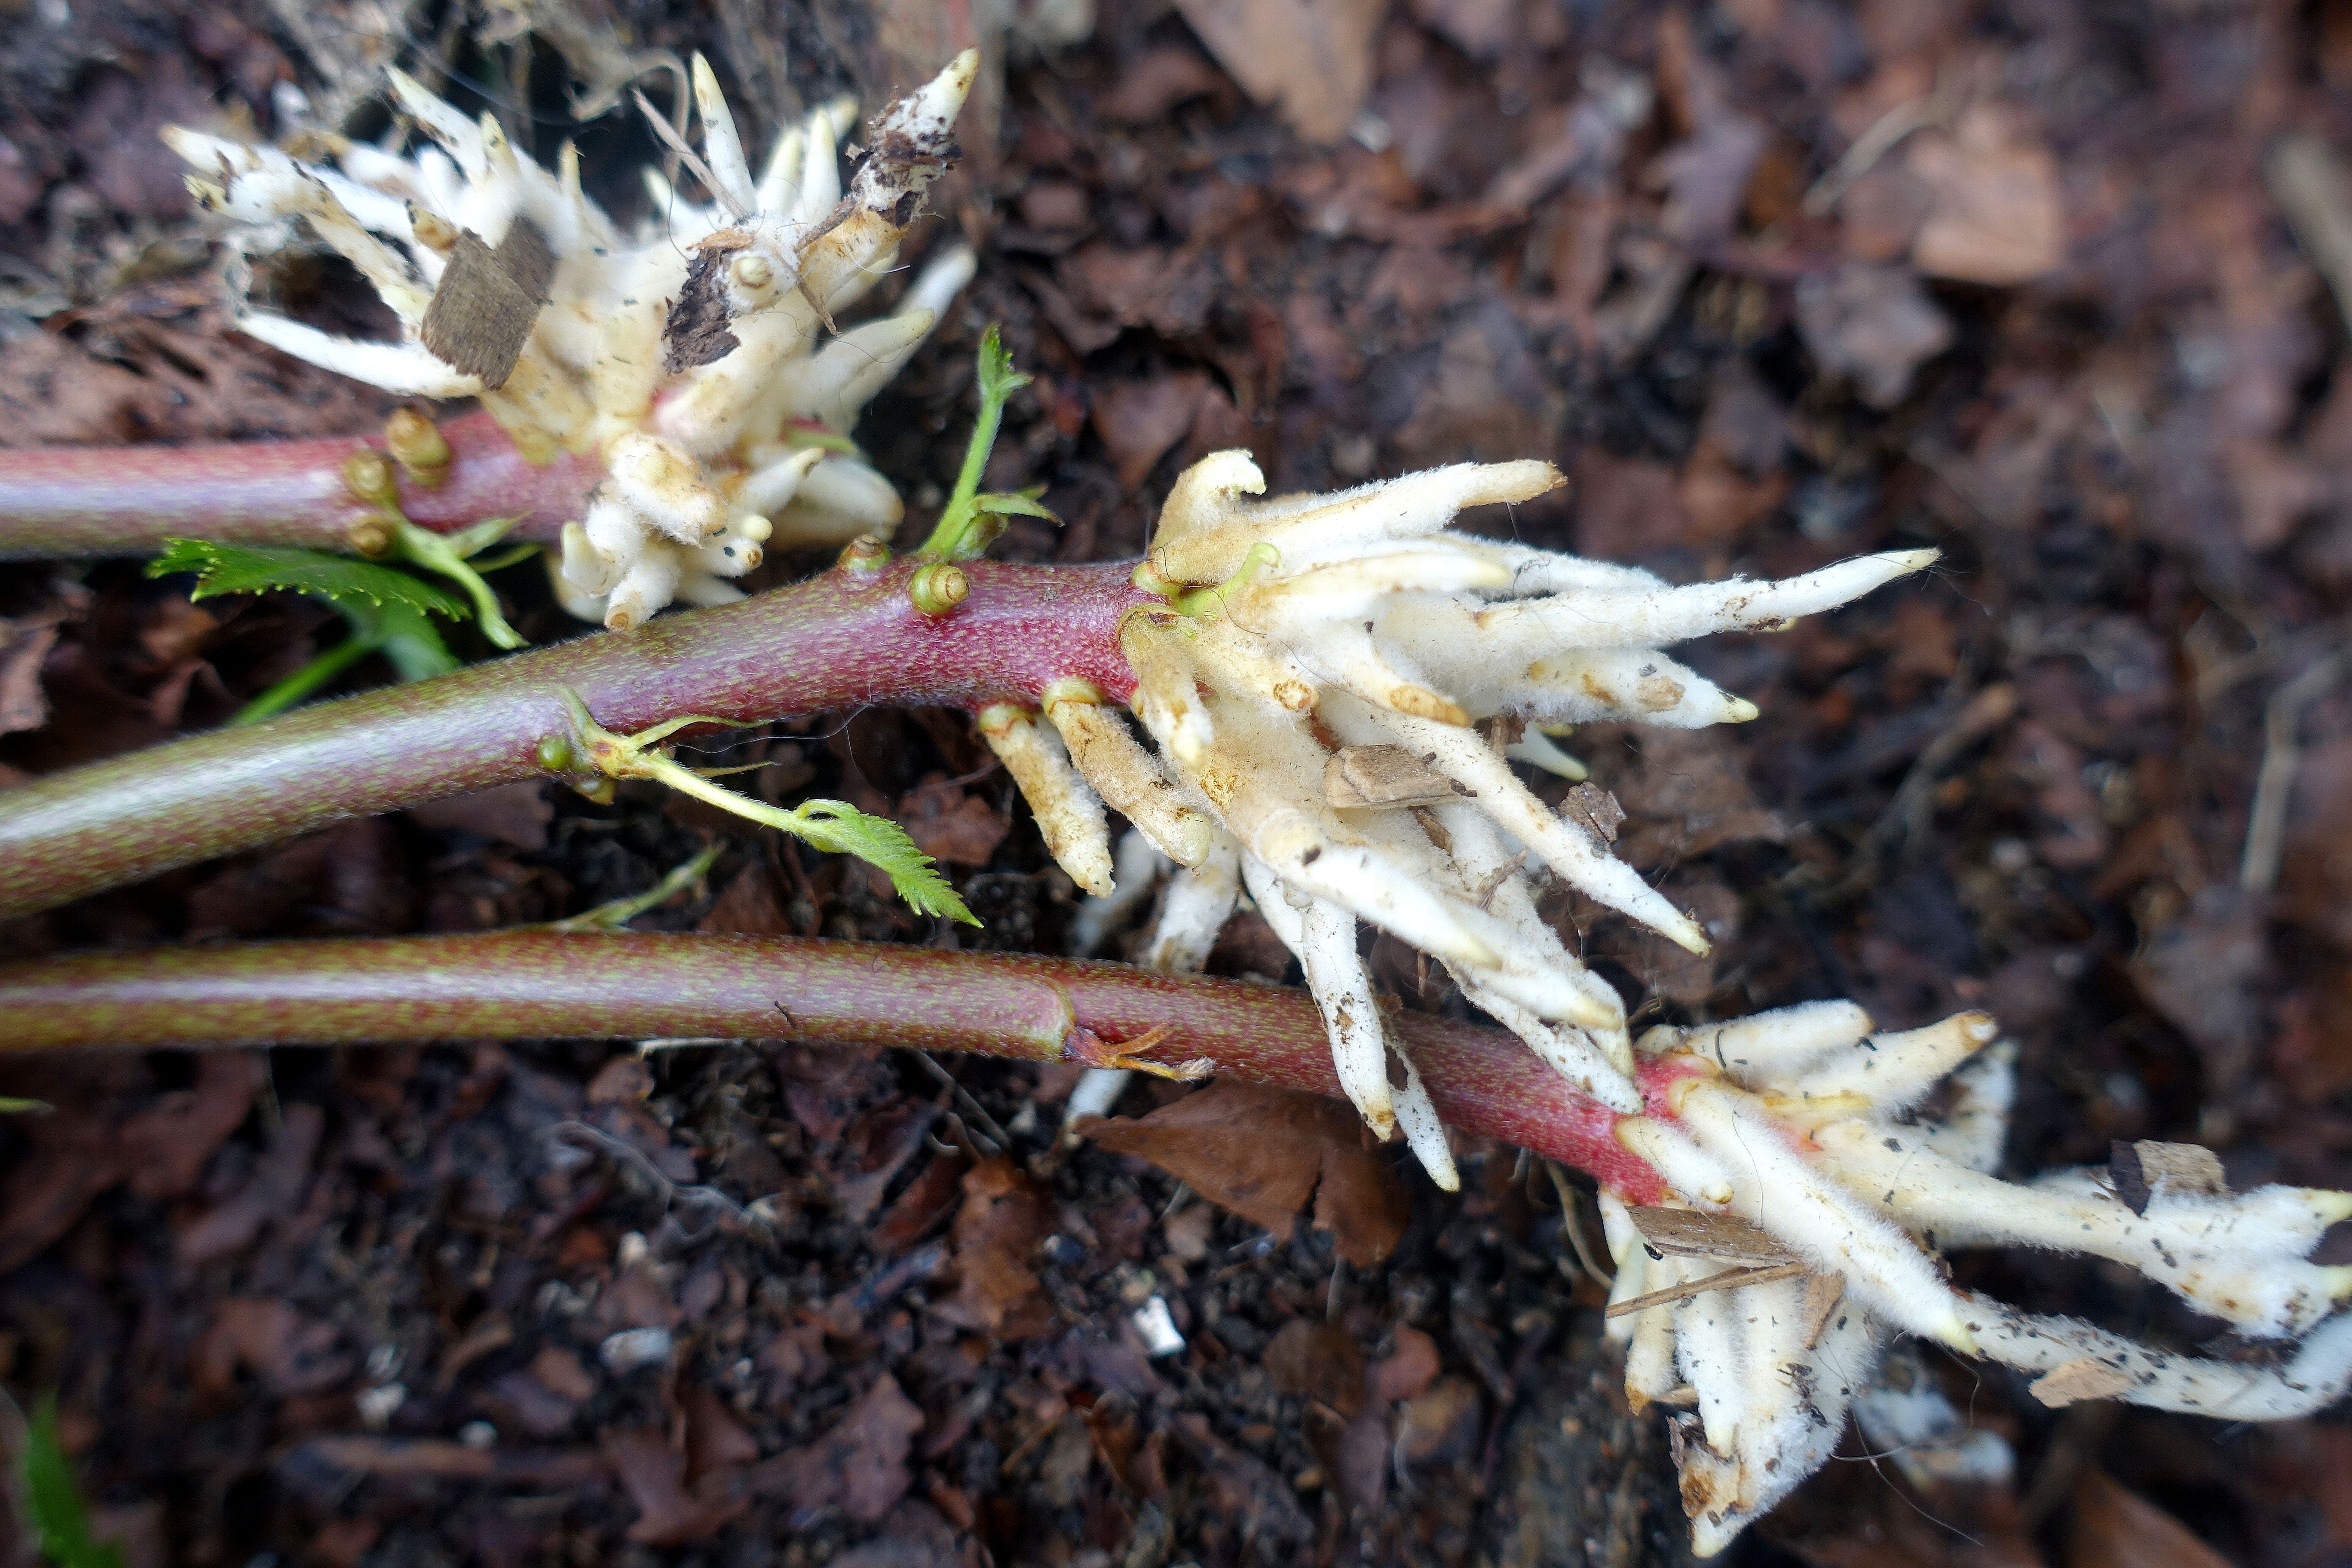
The thick, white roots are developing. They stretch from the branch to the ground.
I probably don't need five new blackberry plants. But my blackberry bushes have already started to develop new roots and I feel like I should use every opportunity I get! I think I will go for a couple of new plants after all. I could always give a few of them away as gifts.
This variety is called Black Satin, it's a thornless variety. The plant is growing in my large polytunnel and seems to like it there. The berries outside ripen in September-October, but they usually get a good head start in the polytunnel of course.
Read more: Get the smart garden tool belt SARA here!
These five blackberry branches (the Black Satin variety) have started to sprout roots. I decided to plant them in pots before winter comes.
Tip layering
I recently decided to cut down my thornless blackberry bush in the polytunnel. That's when I noticed that a few of the branches had developed new roots. This happens when the branches bend to the ground and touch the soil. The new little aerial roots start to grow straight from the tips, that's why the process is called tip layering.
It's really easy to propagate blackberries this way. All you need to do is to cut the branch off a bit above the roots, plant them in pots and then water. You can do this all season long. You can help the tip layering process along by bending parts of the plant down toward to the ground and adding a rock on top. The roots will start growing shortly after!
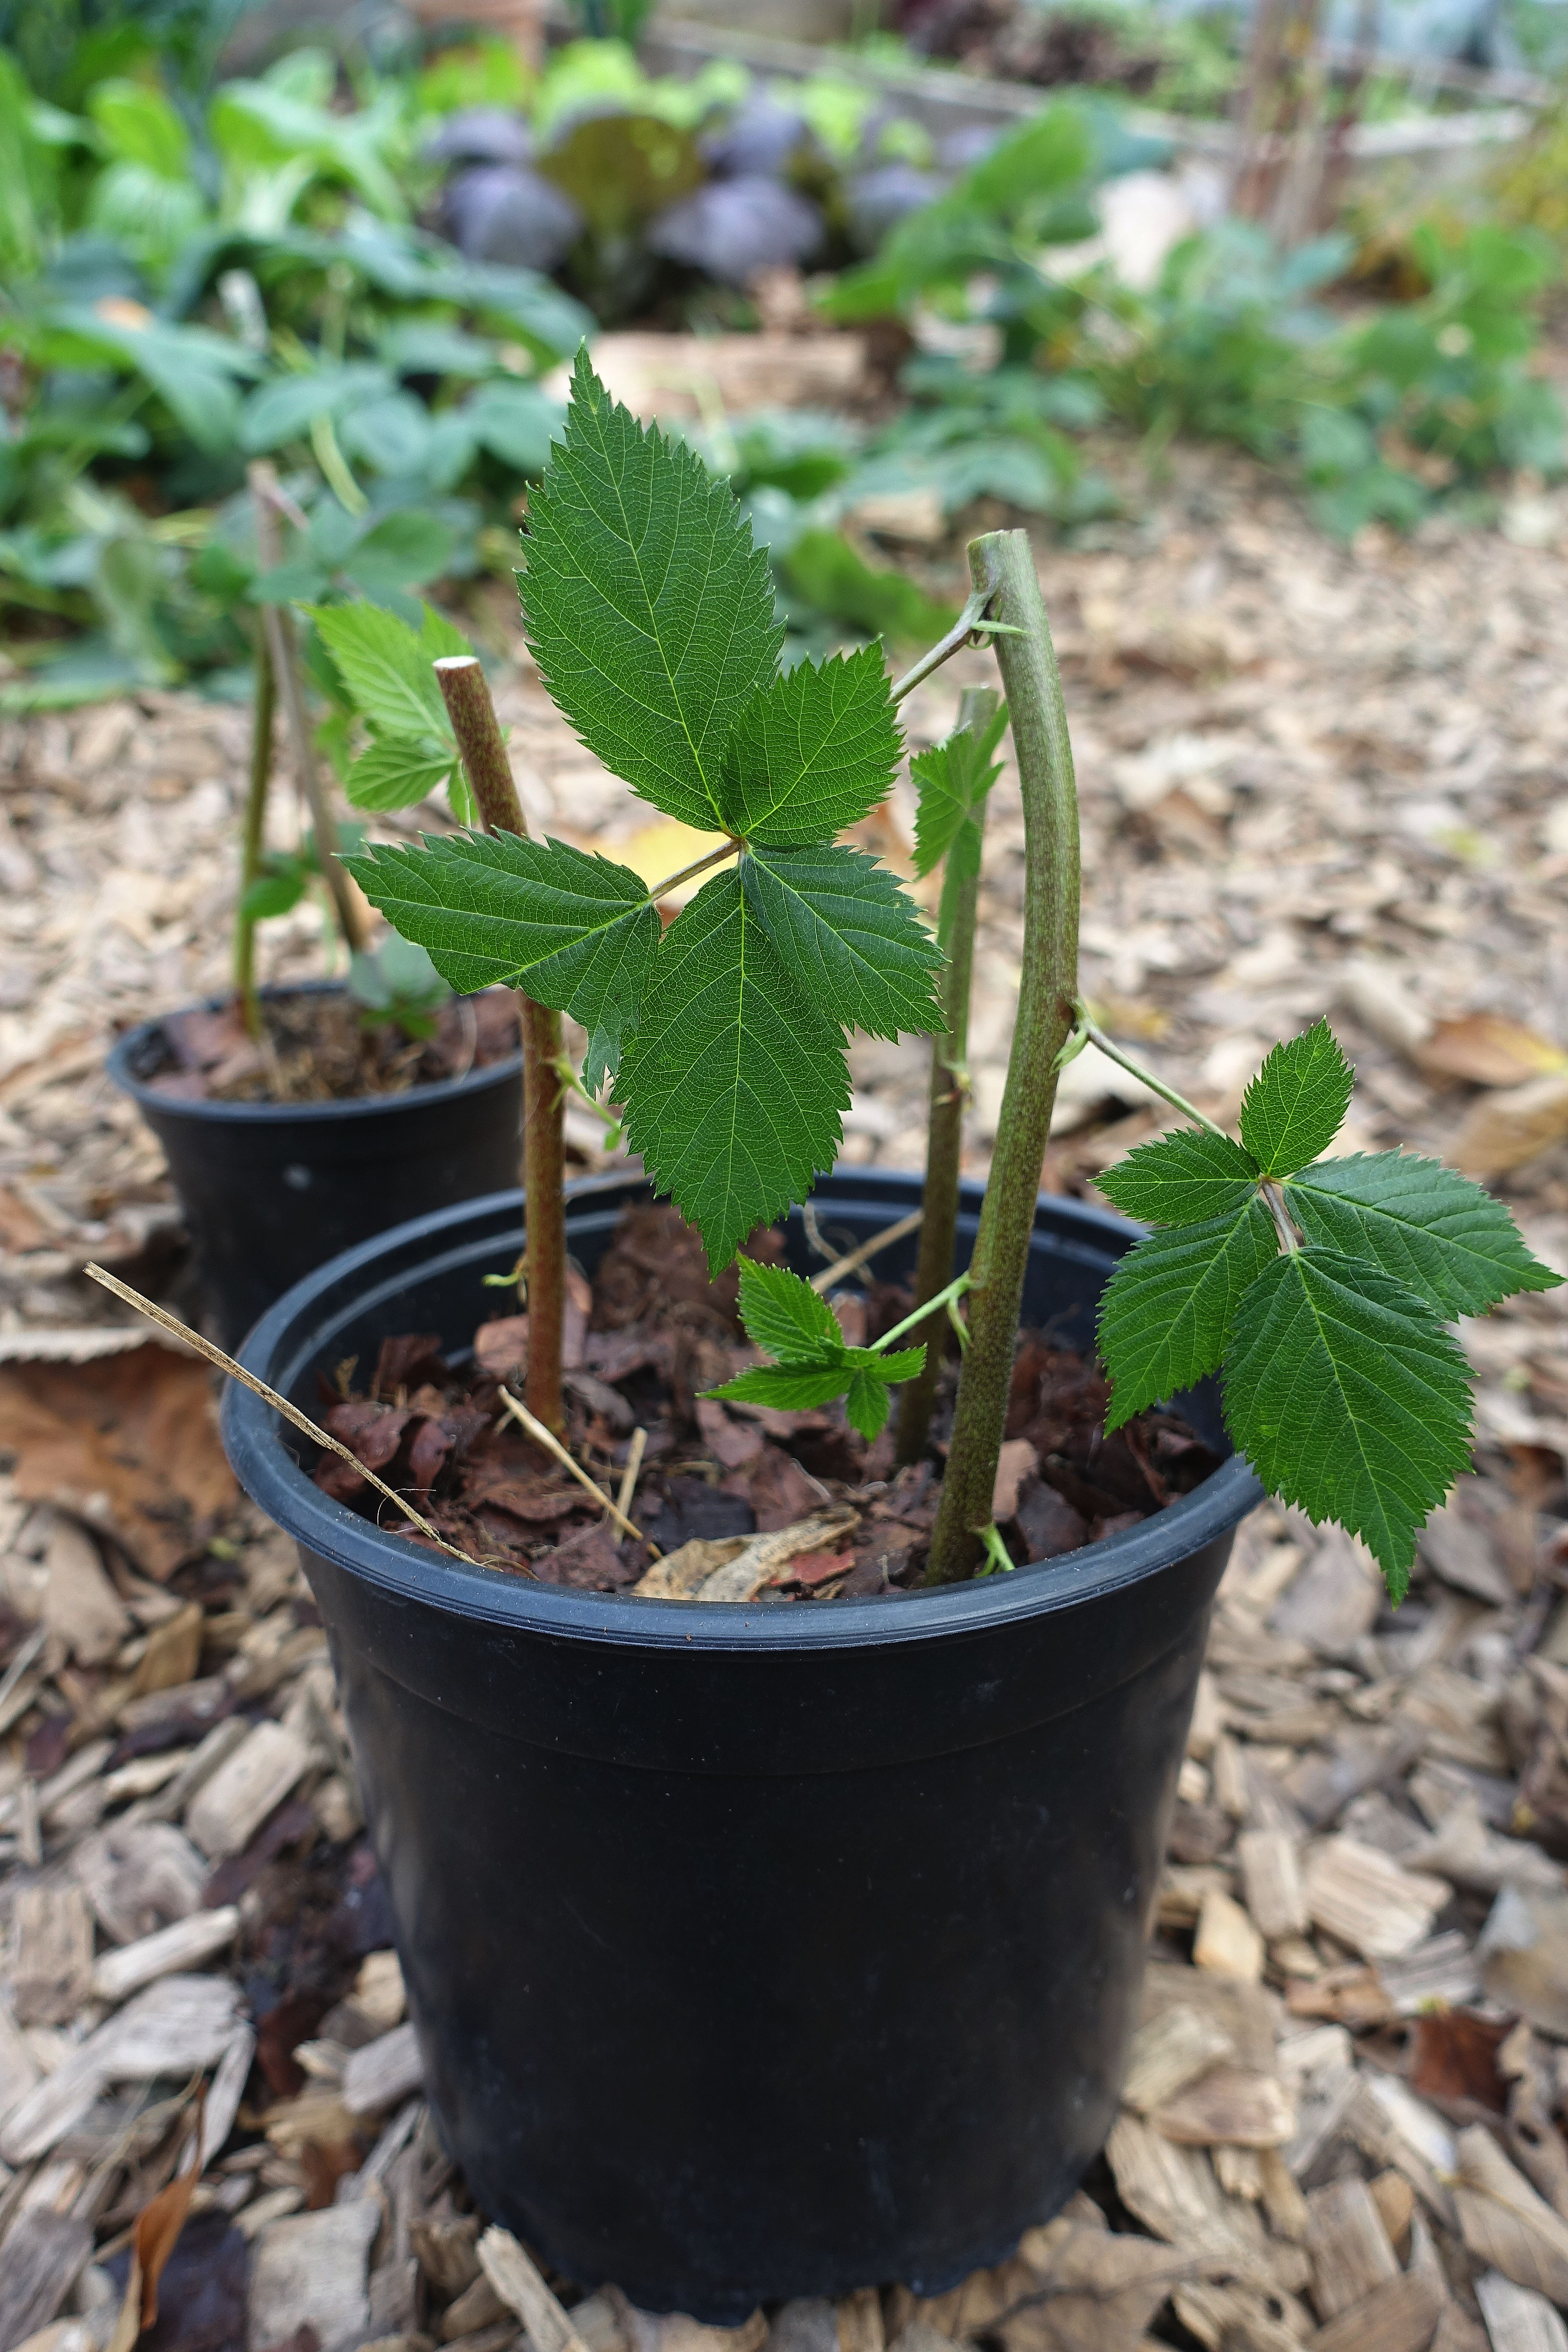
The new plants are standing upside down in the pots, since the roots sprouted from the tips. The plant adapts quickly and will start to grow in the right direction soon.
I put my new blackberry plants in pots filled with partially decomposed compost and then watered them. I plan on digging the pots down in my polytunnel during winter, and then we will see what happens to them when spring comes!
If you want to read and see more from my garden, check out Sara's Kitchen Garden here:
Sara's Kitchen Garden at Facebook
Facebook group: The Kitchen Garden - Worldwide
Sara's Kitchen Garden on YouTube
Letter from the garden - newsletter from Sara's Kitchen Garden
Good luck with your blackberries!
/Sara Bäckmo


Leave a Reply
You must be logged in to post a comment.