Garden DIY: How to Build a Greenhouse Part 2
Creative, fun and challenging! I didn't expect that building a greenhouse would be this rewarding! This is the second part of my series about building your own greenhouse at home.
I'm almost done with my new greenhouse, right before it's time to let it rest over winter. I just need to make a few adjustments before it gets too cold and dark outside.
It's just about time to let my new little greenhouse hibernate. I took care of the necessary tasks before winter and will have to pick up where I left off next year. My expectations of this journey with the greenhouse have come and gone all summer. At times, I fantasized about finishing it completely. And other times, I felt content just imagining a roof on top of the house. I think I found the middle ground now. I'm so happy with what I did so far and I honestly feel ready for a break too.
Read more: How to build a greenhouse part 1
Lots of things have happened since my last post! I documented most of it for a video that I'm going to share with you on YouTube soon, but I wanted to write about my progress too. I just finished a few projects before taking the pictures so be warned, it might look a little messy.
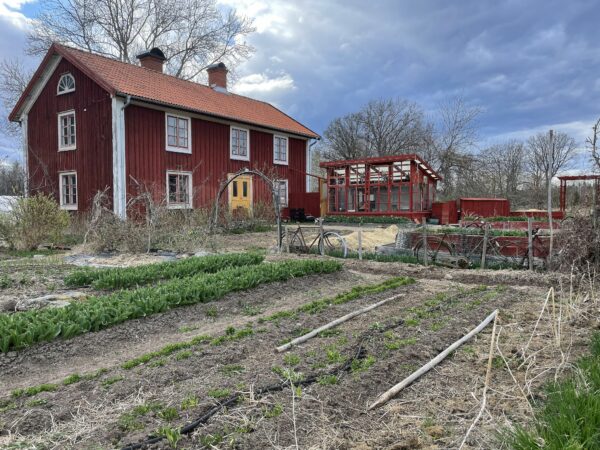
But let's start from the beginning! This is what the project looked like from the very start in the beginning of July:
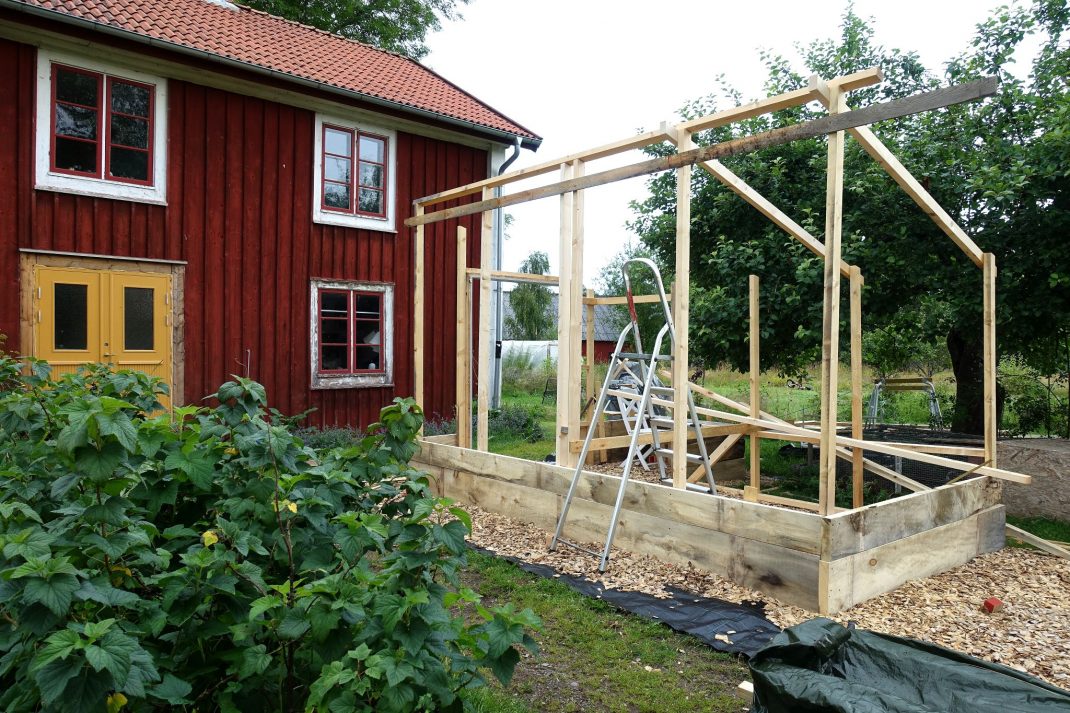
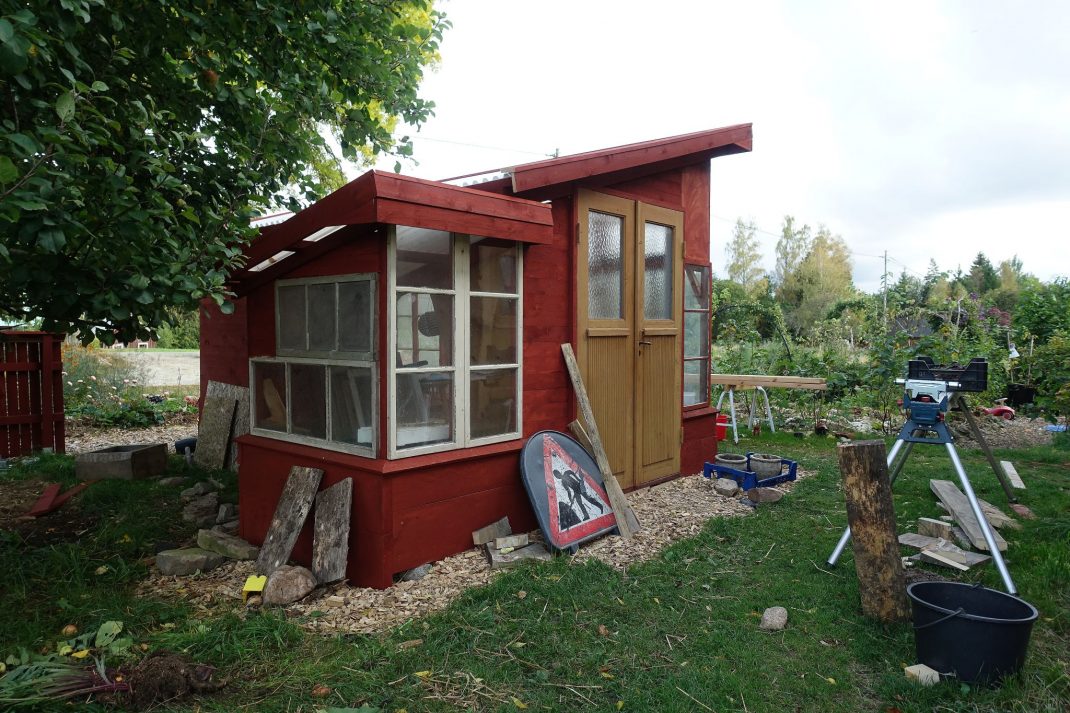
I put my new greenhouse right in front of the house, with a view of the kitchen garden.
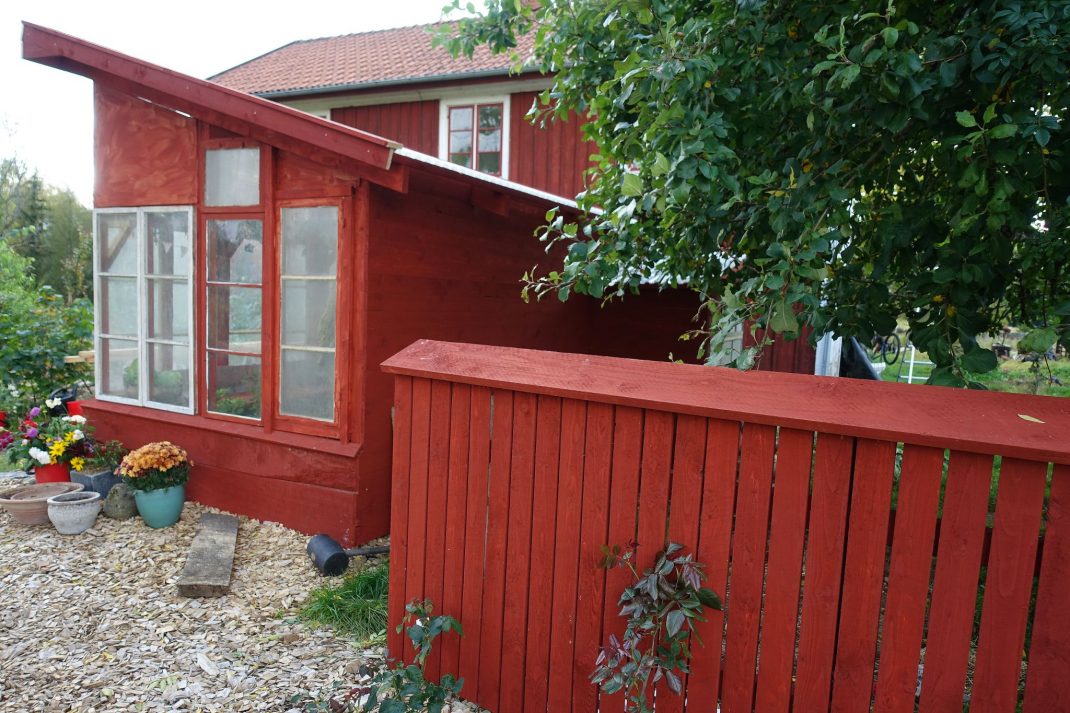
The new greenhouse is creating a completely new look in my garden. I'm going to connect the greenhouse and my new picket fence by the flower beds.
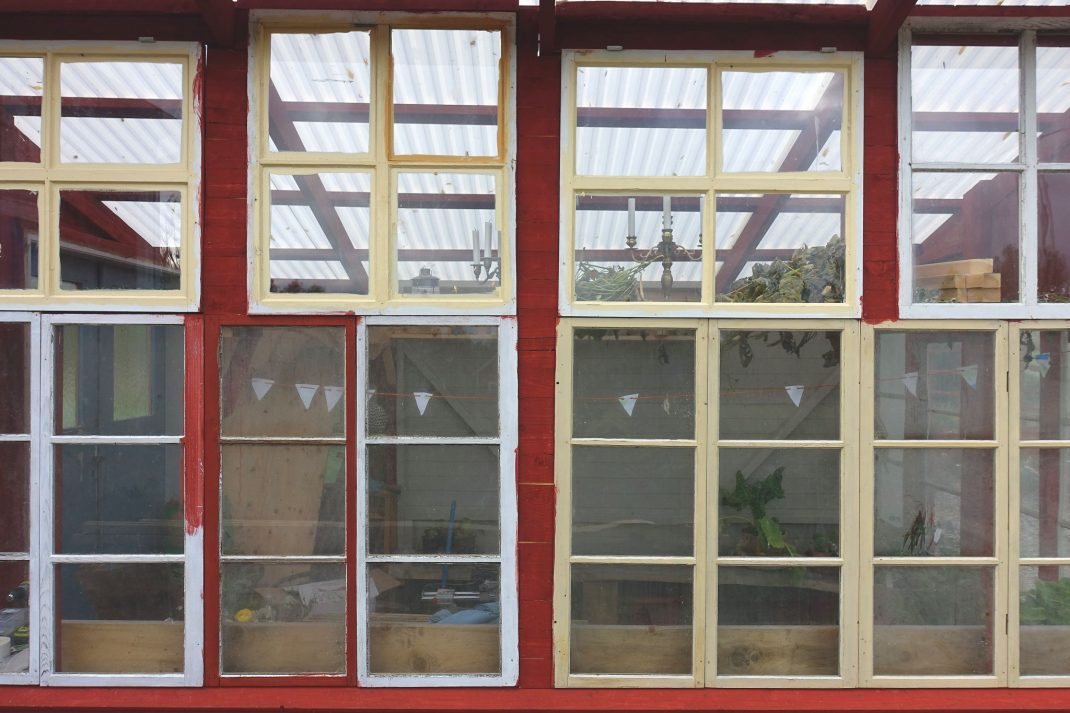
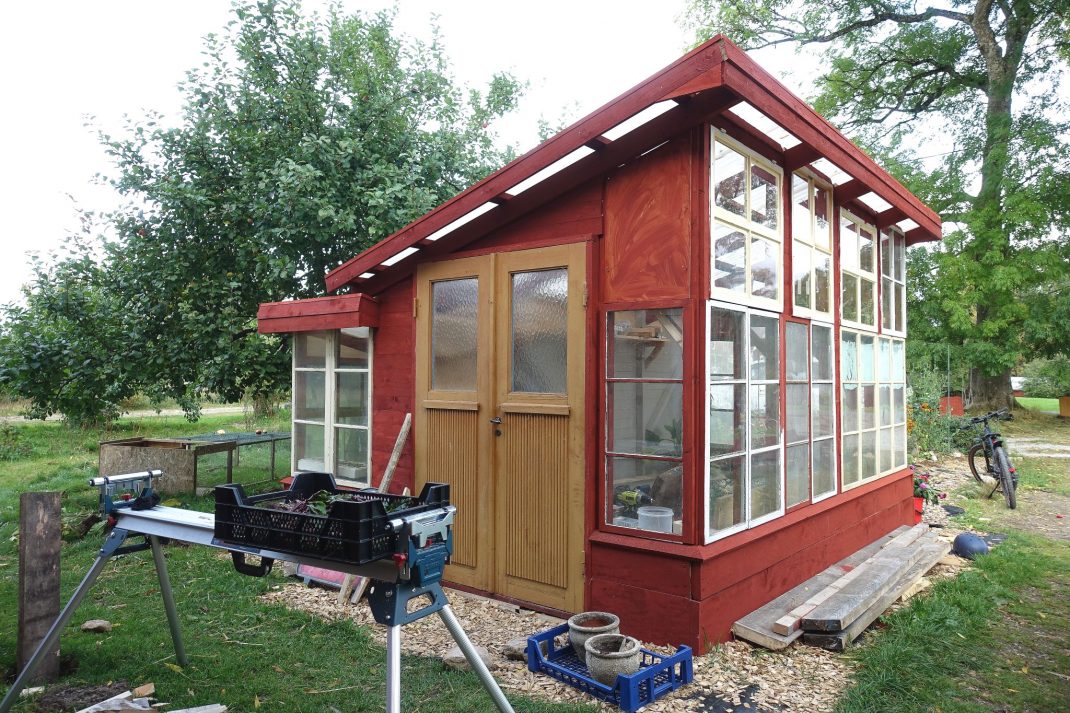
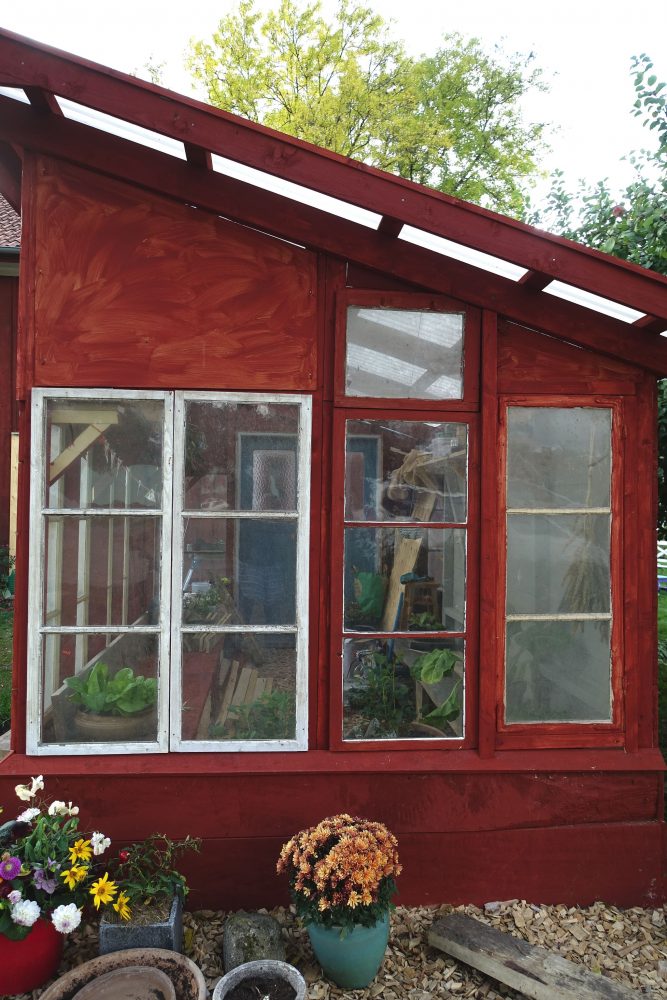
The front of the greenhouse was made with two rows of windows. They haven't been renovated before I installed them, but I'm going to fix them up and paint them when I have the time. The windows are going to be red too.
Piece by Piece
Like I mentioned in my last post, I actually didn't have a finished plan when I started this project. My strategy was instead to build here and now, and do it bit by bit. I completely understand the point of having a more structured approach. But I haven't actually done anything like this before. So for me, I just couldn't anticipate how to put it all together beforehand. Especially since all the windows I'm using are different sizes and the doors and lumber aren't as straight as I might have though. This more spontaneous method of building actually works really well for me. It's just so creative and fun!
Read more about Garden DIY: Creating wattle edging
The window on the gable facing the street (far right) is going to be openable later. I just fastened it the way it is now, since I was running out of time.
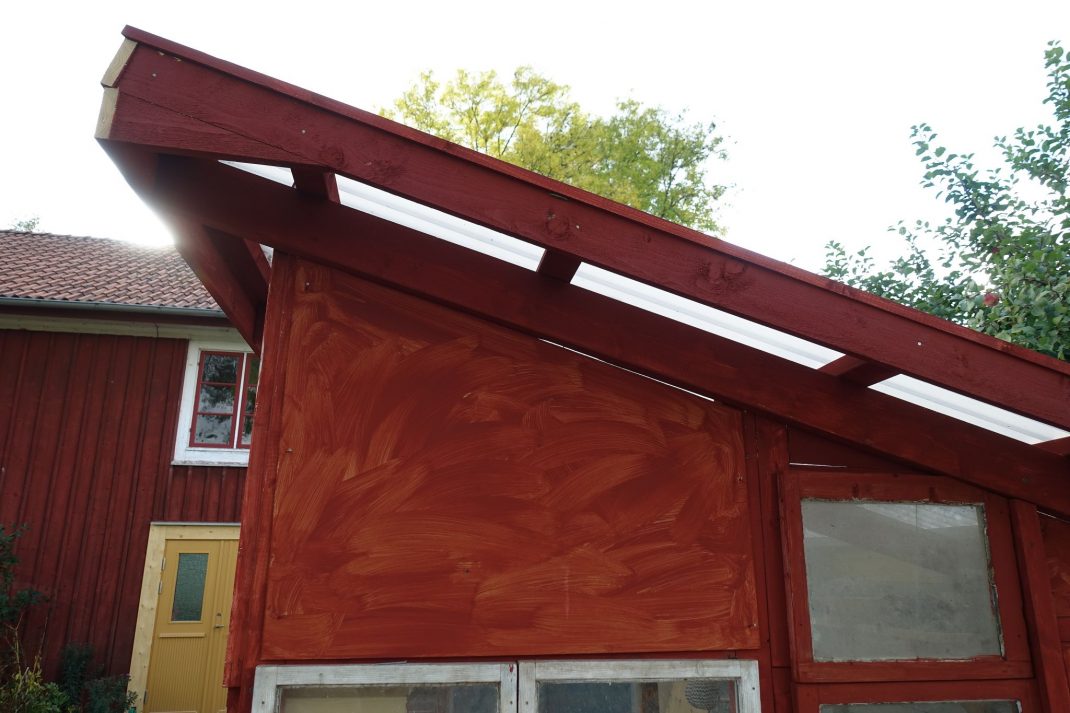
I haven't been able to find suitable windows for some spots. Instead, I just added a masonite board that I painted red as a temporary solution.
I really tried my best not to make more mistakes than necessary this summer. Some of the beams were not the same size (which has been corrected since), but very few things have gone wrong apart from that. Also, I haven't injured myself, changed my mind or felt like quitting.
So, my strategy seems to be working so far. And now I got to build a greenhouse all by myself!
The Evening Box
The greenhouse is 13 ft long and 6.5 ft wide (4 x 2 meters.) And I also decided to make a little extension to the greenhouse, around 10 sq ft (1 square meter.) I call it my Evening box. This is where I'm going to sit and drink a cup of tea in the last evening sun shining through the extra windows on the back wall. My first thought was to have a window I could open here, but I couldn't find a fitting one.
The windows I'm using for this project actually come from my own private collection that I have been building for 20 years. I did however need to add a few new ones to the mix for the upper row and managed to get a good deal from a place in the neighboring village.
Read more: Creating new garden paths
I made a little extension to the greenhouse that I call my Evening box. I'm just going to sit here and enjoy the last rays of sun in the evenings with a nice cup of tea.
Almost Done
As of now, I have a lovely little greenhouse with almost all the windows in place. I still need another 2-3 smaller ones, but I'm just going to get to that when I have the time. The door has been attached, just like the roof and the bargeboards which I was dying to finish.
The inside of the greenhouse is still a work in progress though. I mainly use it as a storage space for my tools, beans, plants and lumber right now. I'm finishing two large benches and am also building shelves along the walls. I also dream about growing my plants vertically against the window-covered walls to really use the beautiful light. One wall inside the greenhouse is going to be grey, the rest red. That gives me some background options whenever I want to film or photograph plants in here. I'm going to show you more of the interior later.
More garden inspiration: Ninnie's gorgeous she shed
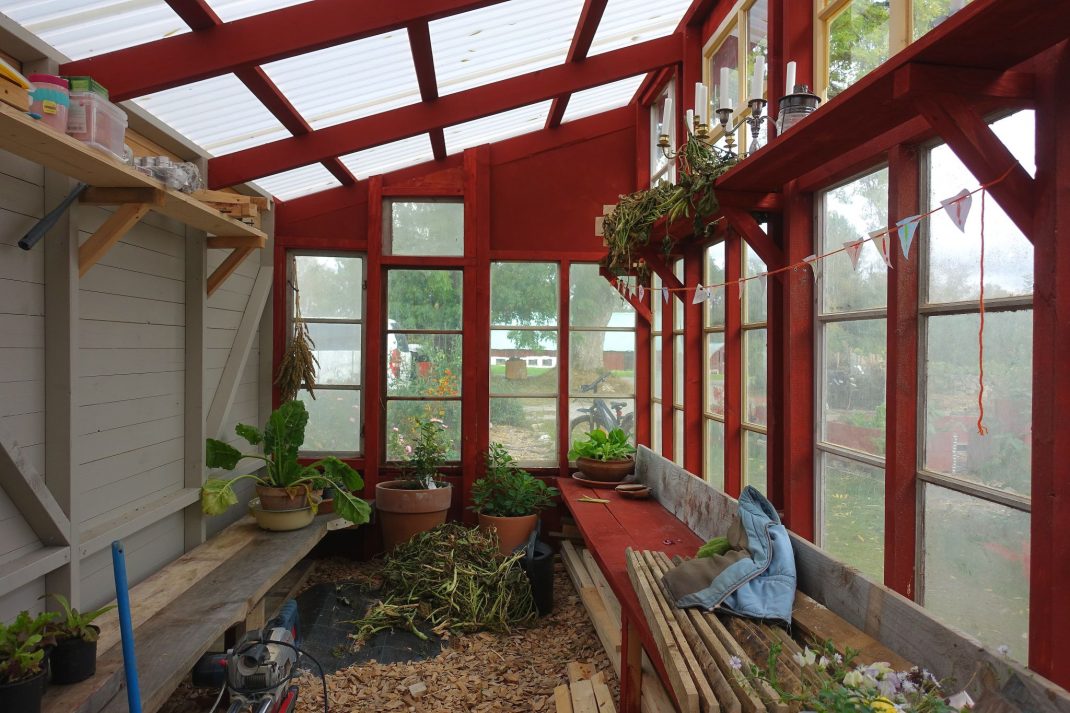
I decided to build two sturdy benches on both sides and I'm also going to add some more shelves too. The black plastic on the ground covers the rock underneath.
I have a few things left before I'm done building. I need to add a few windows on the outside, baseboard and little pieces of wood to edge the windows. These will have to wait until I install the last windows though. I have a few windows on the top row and I'm going to rebuild them so that they can be opened in spring. By then, I'm going to have three windows and a door that I can open up to get the air moving.
When it comes to the outside of the greenhouse, I'm also going to add rain gutters, a workbench and shelves on the back wall. On top of that, I also want to get a little gate that will connect the fence and the greenhouse.
The Red Paint
Many of you who follow Sara's Kitchen Garden have asked me about the red color I used to paint the greenhouse. This is a traditional Swedish red paint that was very common in the 1800s, but it's been around for a lot longer than that. It's a flour paint, which in this case meant that the pigment was mixed with rye flour and water. Our home was built in the 1800s and was also painted with this red flour paint. Check out the video below to see what the house looked like before we started to renovate it:
When I started to fantasize about building my little greenhouse, the first idea was to create just a smaller space with enough room for a few pots with for example eggplants. Of course, I couldn't settle for that! And I'm so happy that I didn't.
This project has helped me gain the courage to try new things and it also gave me some new confidence in my abilities. Of course, I also needed a few items to be able to do this properly. For example my new saw and trailer for my car. I couldn't have done it without them. Also, I'm very happy that I started a few other projects to practice my building skills during summer. I can't wait to build another one!
/Sara Bäckmo
02. November 2020
Leave a Reply