Garden DIY: Wattle Edging
Wattle edging is so cute and quaint! This is probably my favorite way to edge beds in the garden. Keep reading to learn how you can do it too!
The wattle edging really adds a new dimension to my garden! This is such a great way to edge beds.
My little cottage garden reminds me of a flower bud, ready to open at any time. I can sense the beauty waiting to bloom but I have to wait another few weeks before my garden is in its prime. I just can't wait to take my morning walk through the lush cottage garden in July and August.
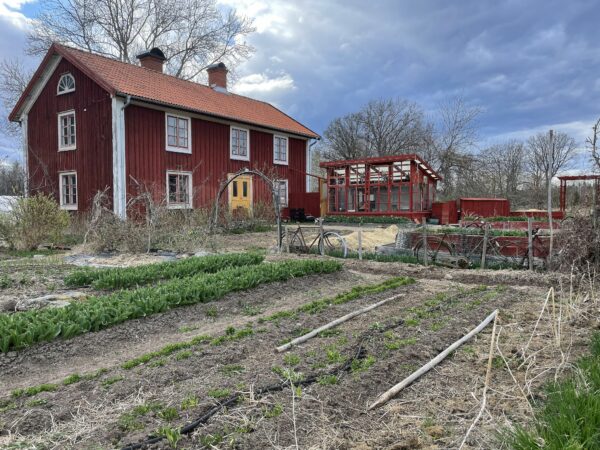
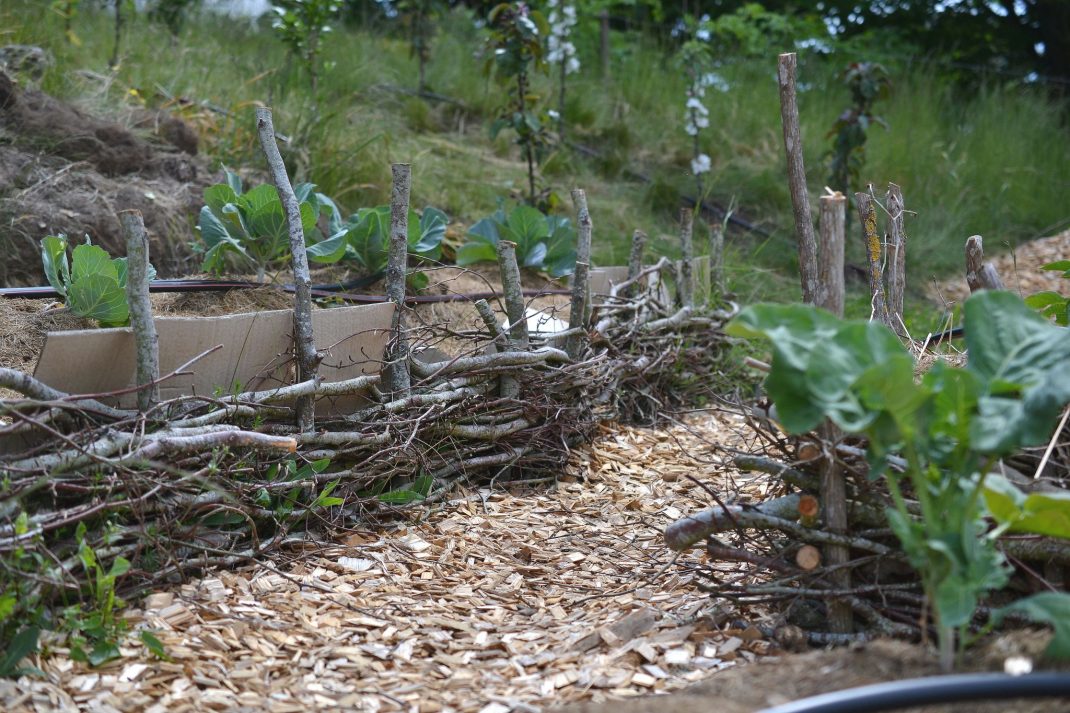
Many of the beds here at Oak Hill are surrounded by wattle edging. This is a really simple solution if you want to make a little extra effort to edge your beds. It looks so nice and it's actually quite easy to create. Not the most practical solution at times, but it's worth it.
I made two large beds here with wattle edging, as well as another makeshift edge for the first bed I created here in the slope.
Read more: Making a woven compost basket
The technique of creating wattle edging is similar to what my mother does when she makes her woven compost baskets. Watch the video below to learn more:
The wattle edging
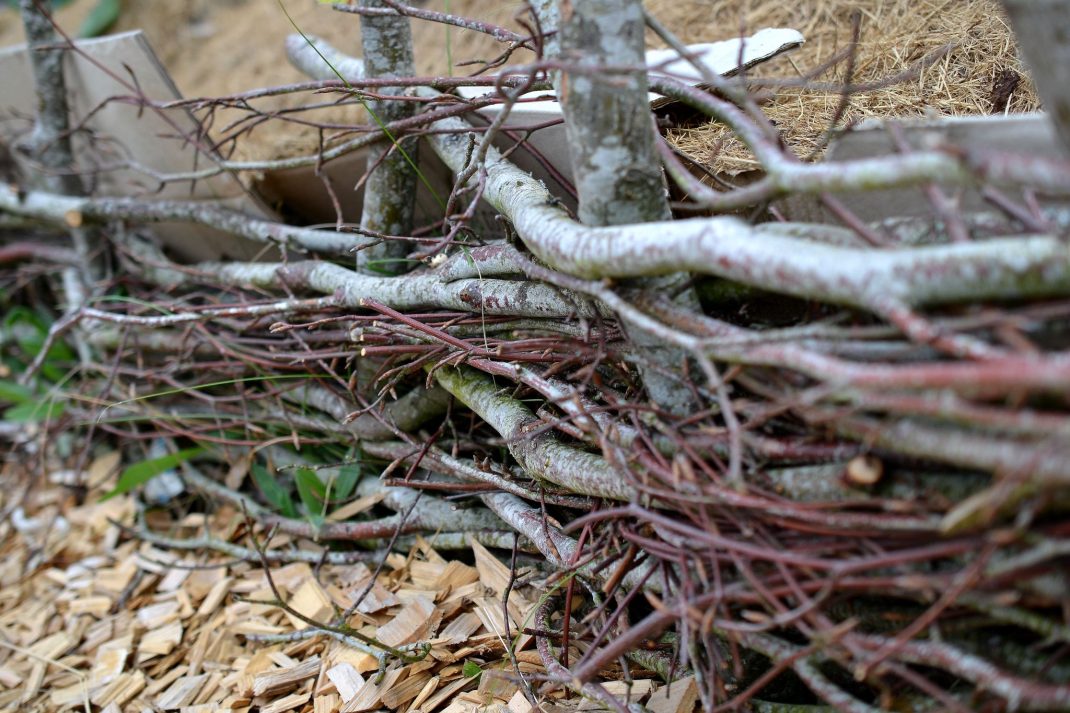
You need very little to create wattle edging, basically just a large pile of fresh brushwood. Don't try to weave dry twigs for this project though, since they break very easily if bent. You can however use dry twigs and branches for the posts.
Cut the twigs that you want to use for your posts, bind them together and then arrange them around the bed that you want to edge.
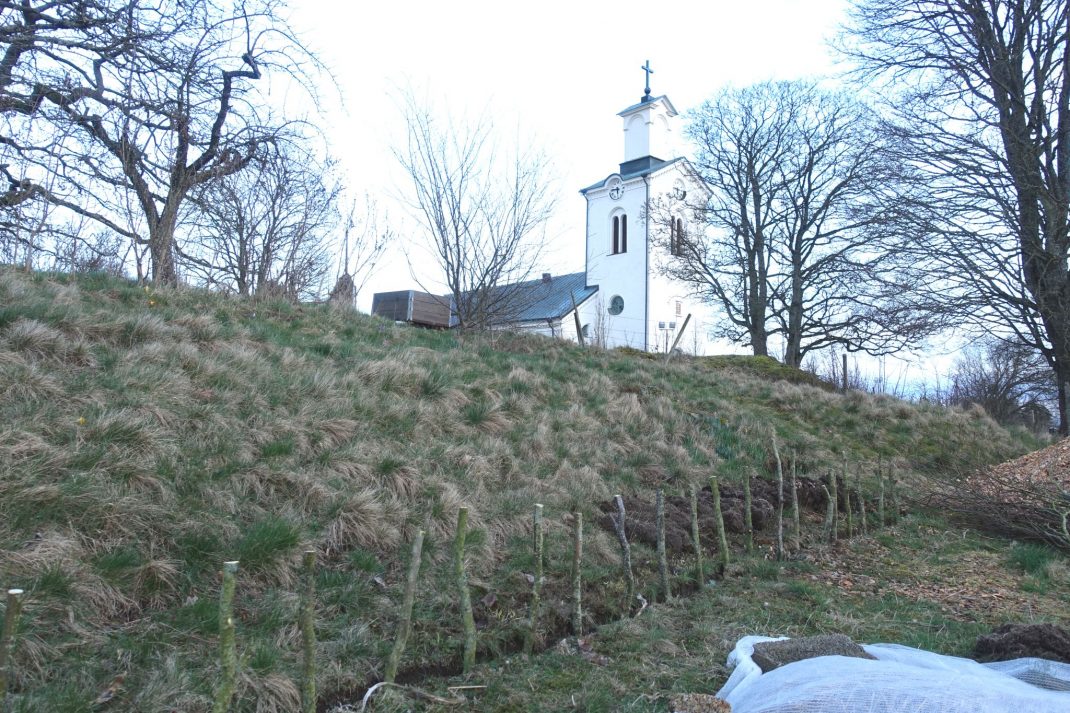
This is what the slope looked like when I started my project.
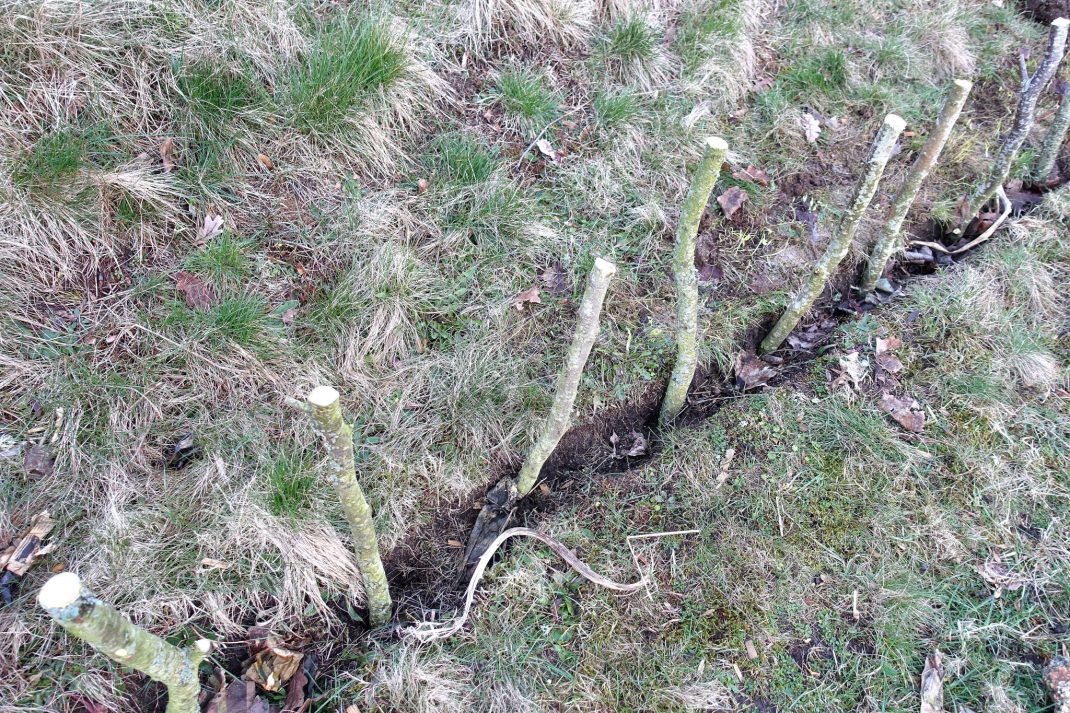
The posts are installed quite deep into the soil, in a little ditch where I removed the lawn.
Remember to cut any larger side shoots from the twigs that you want to use. These twigs are easier to weave and the end result will look a lot nicer without the shoots.
Weave the twigs between the posts, every other twig on the inside vs outside. When you run out of twigs, you can just continue with a new batch where you left off. You can leave the twigs sticking out from the corners for now.
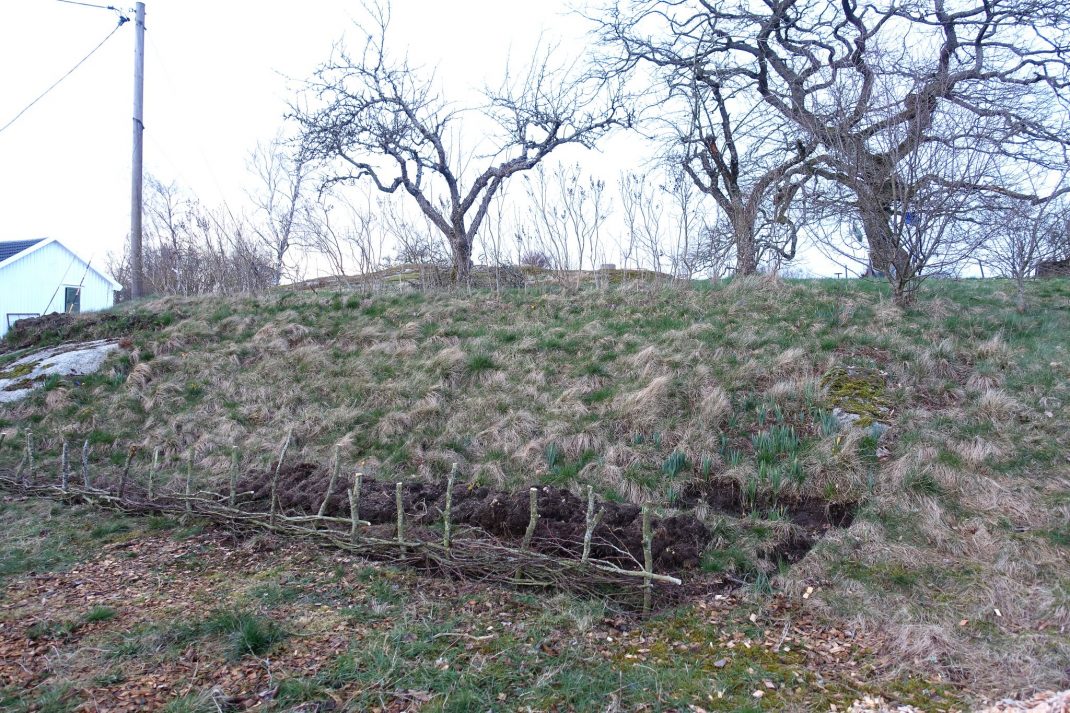
The start of the project this winter.
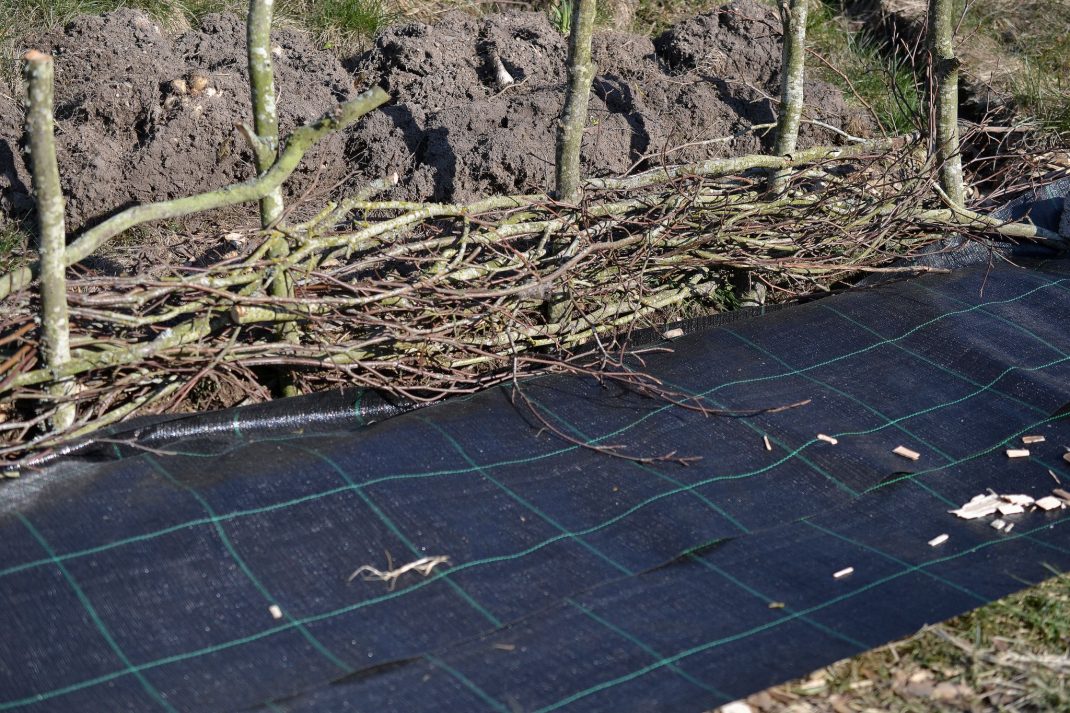
In spring, I decided to make the wattle edging a little taller but I wasn't able to finish the project. I'm going to do it when I have time. I put gardening fabric on the ground and covered it with woodchips.
Surprisingly sturdy
Push the twigs together to pack the material.
Cut all the shoots from the sides and the corners when you feel happy with the height of your wattle edging.
This construction is actually surprisingly stable, even if the posts might look a little unsteady in the beginning. The posts are kept in place with the twigs woven around them.
More garden inspiration: A beautiful Swedish Cottage Garden
The wattle edging takes a while to make, but it's absolutely worth the trouble!
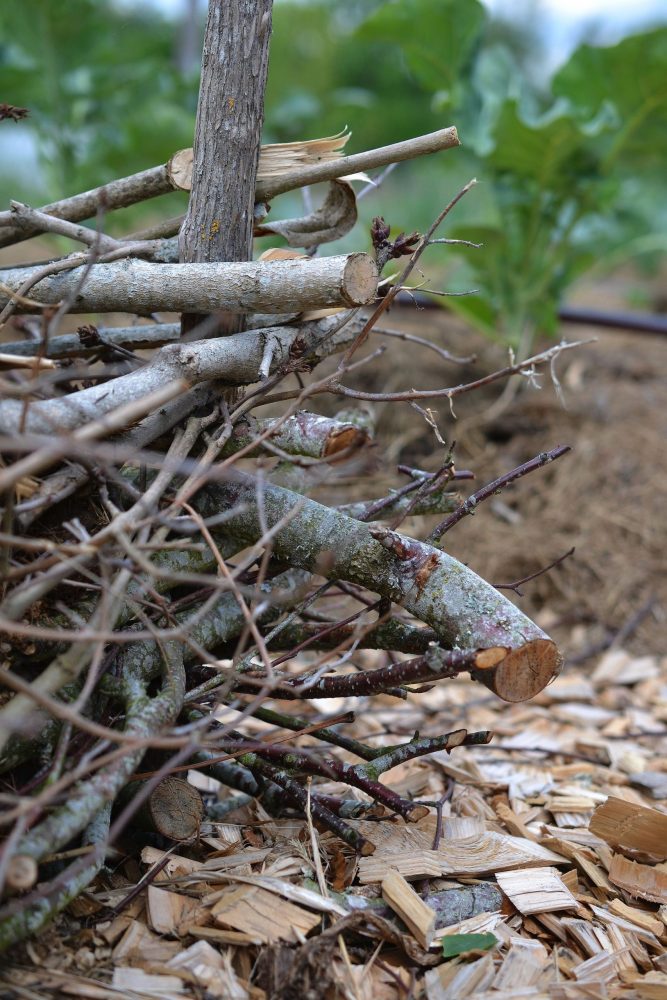
I cut the twigs in one of the corners. It's a lot easier to do it afterwards than cutting each little twig one by one.
I put woodchips around the bed and wattle edging here. The woodchips are placed on a landscape fabric right on the lawn. So, I haven't actually been digging or removing anything.
I'm so happy with the wattle edging, and I look forward to making even more! This is a great way to edge beds in the garden.
Not very durable
The wattle edging will last a while, but the twigs do decompose within a few years. That actually suits me really well though, since I can remake it with new material later. If you want something that lasts a bit longer though, then I would go for another type of edging.
My wattle edging in the picture above is located in a slope and I think that it's going to have to withstand a lot of pressure from above. I'm guessing that the wattle edging will last a season or two. I have to find a new solution after that.
You might notice the grass growing around the wattle edging in my garden. It's actually a conscious choice not to remove it, since I haven't had the opportunity to do it effectively yet. But as soon as I get more rooted here, I'm going to have more time to work on it. For example by doing extensive weeding or covering the ground in different ways.
I can't wait to see my summer flowers and vegetables grow large and lush against the quaint wattle edging!
/Sara Bäckmo
29. June 2020